I'm sure everyone knows this situation: you just made ice cream or zabaglione and are left with quite a few egg whites... what do you do? Make another pavlova or meringues again? Or do you want to try something new and different?
If you want to try something different I have a great recipe! I had a whole bunch of egg whites left over after making Strawberry Ice Cream and was not in the mood for meringues. So I searched for an alternative. I found an egg white cake recipe over on Nami-Nami and the idea appealed to me.
When reading the recipe however I noticed there was nothing in there to give it flavour, so I adapted it by adding vanilla and lemon zest. And boy, was I glad I did. The vanilla and lemon elevated this cake from just a cake into a wonderful, flavourful cake. It was absolutely delicious.
I had planned to pour ganache over the cake but in the end decided not to, because it was unnecessary. I'll definitely be making this cake more often when I'm stuck with left-over egg whites! It is a very versatile cake. Instead of adding vanilla and lemon you could add about anything you like. So if your in the mood for something else, just do it!
Recipe
Egg White Cake
6 large egg whites
250 gram caster sugar
160 gram flour
1 heaped tablespoon potatostarch or cornflour
1 teaspoon baking powder
2 teaspoons vanilla-extract
Zest of 1 lemon
100 gram melted butter, slightly cooled
Instructions:
Preheat the oven to 180˚C (350˚F).
Whisk the egg whites with 2 tablespoons of sugar until thick and pale and very foamy.
Mix the rest of the sugar with the flour, potato starch and baking powder, then sift into the egg mixture and fold in gently.
Fold in the cool melted butter, the vanilla and the lemon zest.
Pour the batter into a buttered bundt-form and bake for 30-40 minutes.
Test with a wooden toothpick to see if it is done.
Cool slightly before turning out of the cake tin.
Tuesday, May 31, 2011
Sunday, May 29, 2011
Buttermilk Chive Biscuits
In my quest for finding a great bun/roll/anything I stumbled upon a recipe for Buttermilk Chive Biscuits. Now I know that it is not very bready, but it sounded great, so I thought I'd give it a try! I had al the ingredients on hand and set to work.
Now one thing you should now is that where I come from, there are no such things as biscuits.... well we have biscuits, but those are sweet cookies, something completely different. So I had no idea what the dough should look like, how it's consistency should feel, no prior experience, etc. etc., you get the picture.
I started making the dough and it al went fine, but when I turned it out an a floured surface I discovered that it was actually more a batter than a dough. So I was unable to cut rounds out of it. I have no idea what went wrong and as I have no idea how the dough is supposed to be I can't fix it. I decided to just use really big spoons and sort of shape the biscuits on the baking sheet. This worked fine for me, because once they were baked, they were amazing! The taste and structure were great. The buttermilk really adds a depth to these things.
I'm not saying that my quest is already over, but I am saying that I'll definitely be making these more often. Even if they didn't turn out perfectly!
Recipe
Buttermilk Chive Biscuits
Yield: about 12
Ingredients:
2 cups flour
2 tablespoons sugar
1 1/2 tablespoons baking powder
1/2 teaspoon salt
110 gram (8 tablespoons) cold butter, cut into small pieces
1 egg
1 egg yolk (optional)
1 scant cup buttermilk
¼ cup snipped fresh chives
Instructions:
Preheat the oven to 200˚C (400˚ F).
Line baking sheet with parchment paper.
In a bowl, combine the flour, sugar, baking powder and salt. Whisk together to blend.
Add the cold butter to the dry ingredients and cut the butter into the flour until the mixture resembles coarse meal and the largest butter pieces are the size of peas. I used my stand mixer, but this can also be done in a food processor.
Place the egg and egg yolk in a liquid measuring cup. Add enough buttermilk to measure a full cup. Whisk in the chives.
Add the buttermilk mixture to the flour mixture and mix together gently just until the dough comes together and all the dry ingredients are absorbed.
Transfer the dough to a lightly floured work surface and pat into a disc that is ½-inch thick. Use a well-floured 3-inch round biscuit cutter and cut out dough rounds. Place finished rounds on the prepared baking sheets. Gently re-roll the excess dough and cut out additional biscuits. Or just scoop the dough onto the baking sheets if your dough is more a batter.
Bake until golden brown and fluffy, about 12-15 minutes. Remove from the oven and serve warm.
Friday, May 27, 2011
Strawberry Ice Cream
My ice cream machine broke down! It left me heartbroken and crying in the kitchen. But then I realised I had an excuse to buy a new one! I always love it when I have a valid reason to spend some money! So I started doing some research on ice cream machines. I would have loved to buy a self-freezing machine, but with prices starting at € 400,- I decided that was a bit too much. After a while I remembered that you can buy an ice cream maker attachment for a Kitchenaid standmixer. I was sold. It's perfect because you just put the bowl in the freezer and don't have to store an extra machine!
So I went out and bought it, put the bowl in the freezer and the next day I made this strawberry ice cream. It is another recipe from joy of baking. After the huge success of the chocolate ice cream I wanted to try out this recipe, to see if it would turn out just as great.
It was another custard-based ice cream, so it was indeed very creamy and smooth. But I did found it slightly lacking in the strawberry-department. I was looking for an ice cream which was bursting with strawberry-flavour. However, this is a very nice ice cream, but maybe more for a fancy dinner or a cold day.
Strawberry Ice Cream
Ingredients:
2 cups half-and-half
5 large egg yolks
2/3 cup granulated sugar
1/2 vanilla bean
2/3 cup strawberry puree (strawberries pureed with a little sugar and a squize of lemon juice)
Instructions:
In a saucepan bring the half-and-half and the vanilla bean to the scalding point where the milk begins to foam up.
Tuesday, May 24, 2011
Sugar Cookies
My baby girls' intern-teacher left last week and instead of buying a present I thought I'd give decorated sugar cookies a go. Over the last few months I've seen several gorgeous decorated cookies and was extremely impressed with them. I've never worked with royal icing before so it was quite an adventure for me. I haven't made pictures of the end results, but I did get a lot of compliments.
I myself wasn't 100% satisfied. I made hearts with small sweet words written on top of them. I only used two colours, a very pale pink and a darker purple. The outlining went great, the flooding also went great, but the detailing was a bit tricky, I think it is definitely worth the time to practice, so I'll be looking for a new occasion to make these again.
But this is not a recipe for royal icing, this is about the cookies. Or should I say The Cookies. I found another great recipe over on Annie's Eats. I know, I know, I know.... I've been on a bit of an Annie-bender.... I can totally explain this. I recently went through her archives and marked a lot of recipes for my "to make" list, which I am now making. But back to The Cookies. They are very easy to make, hold their shape, have a nice texture and amazing flavour! Which is why I say The Cookies. The addition of lemon zest, vanilla extract and vanilla bean elevates these cookies from... well, cookies to Cookies. I had a hard time trying not to eat them.
So if you're looking for a great sugar cookie recipe: use this one. You will not regret it!
Recipe
Sugar Cookies
Yield: depends on size cookie cutter, I made about 60 small hearts
Ingredients:
2 sticks unsalted butter, room temperature
1 cup confectioners' sugar
1 large egg
2 1/2 teaspoon vanilla extract
1 vanilla bean, split lengthwise
Zest of half a lemon
2 1/2 cups flour
1 teaspoon salt
Instructions:
Cream together the butter and confectioners' sugar until smooth, about 1-2 minutes on medium-high speed.
Scrape the seeds from the vanilla bean with the back of a knife.
Add to the butter-mixture, the egg, vanilla extract, vanilla bean seeds and lemon zest and beat until blended.
Mix in the flour and salt on low speed just until incorporated.
Form the dough into a disc and wrap tightly with plastic wrap. Put in the refrigerator for 1-2 hours, until chilled and firm.
Preheat the oven to 190˚C (375˚F). Line baking sheets with parchment paper.
Roll out the dough on a floured work surface, about 1/4-inch thick.
Cut the dough with cookie cutters. Transfer the cookies to the prepared baking sheets.
Bake 8-10 minutes, rotating the sheets halfway through, until fully baked but not at all browned.
Let cool for 5 minutes on the baking sheets and then transfer to a wire rack to cool completely.
When the cookies are completely cooled you can decorate them as you want to.
Sunday, May 22, 2011
Pull-apart Dinner Rolls

I have set myself on a quest for finding something great to accompany dinners, albeit rolls, buns or biscuits I want to find that one great recipe you can always turn to. So to start things of I made Pull-apart dinner rolls, for which I found a recipe on The Pioneer Woman. Now, the pioneer woman says that these rolls are no-knead, but I couldn't make the dough without kneading, so I'm not gonna say they are no-knead.
The dough, however was quite easy to make, I had to knead quite a bit in the end, so if you have a stand mixer, you might as well make it with that, makes life a little easier. I only encountered some problems when rolling little balls out of the dough... it was a little sticky, so I kept washing my hands to be able to actually roll balls.
These rolls taste great when they are just out of the oven and warm. When they started to cool, I became less enthusiastic... They became very tough and chewy very quickly. It might be a side-effect from using only all-purpose flour, but it could just be my "fantastic" baking skills... I don't know.
So, all in all I was slightly positive but for me this recipe was not a winner. You might like it though, so I'm still going to give you the recipe. Oh, and the amount is massive, so I used half the recipe and it was still to much for just the four of us!
Recipe
Pull-apart Dinner Rolls
Yield: 24 Rolls
Ingredients:
4 cups milk
1 cup sugar
1 cup vegetable oil
9 cups flour
2 packages active dry yeast
1 heaping teaspoon baking powder
1 scant teaspoon baking soda
2 tablespoons salt
Instructions:
Pour 4 cups of milk into a stock pot or Dutch oven. Add the sugar and vegetable oil. Stir to combine. Let the mixture become scalding hot.
Turn of the heat and let the mixture cool to warm/lukewarm, between 90ºF and 110ºF.
When the mixture is the right temperature add in 4 cups of flour and the yeast.
After the yeast and flour are mixed well, add another 4 cups of flour and stir together.
Cover the mixture with a teatowel and let rise for 1 hour or until almost doubled in size.
When it has risen sufficiently add the last cup of flour, the baking powder, the baking soda and the salt. Stir (or knead) until combined.
Butter 1 or 2 muffin pans. Form the rolls by pinching off a walnut sized piece of dough and rolling it into a little ball. Repeat and tuck three balls of dough into each buttered muffin cup. Continue until pan is full.
Cover and allow to rise for 1 to 2 hours.
Preheat the oven to 200ºC (400ºF) and bake 15-20 minutes until golden brown.
Serve warm with lots of butter!
Friday, May 20, 2011
Oatmeal Buttermilk Wheat Bread

This weekend I decided to give making a bread another try. I found a recipe on Annie's Eats which sounded great and easy. The only times I made an actual bread were with my dad's bread making machine, so while that worked great I didn't think it really counts, because all you have to do is throw in some ingredients and set the timer.
I gathered all the ingredients and set to work and you know what? It's not much more complicated or different from making a bread in a bread baking machine. Okay, I had to soak the oats in some boiling water... big deal. It really was extremely simple. Only down side is... you can't set a timer and wake up with the smell of freshly baked bread, but other than that it worked like a charm! I'm definitely gonna make more bread!
My bread was very slightly undercooked. A minute or two more and it would have been perfect. It probably happened because I opened the oven a few times to gawk at my gorgeous loaf of bread! It is a big bread. Luckily the girls loved this bread also, so we finished it in two days, but if you want to enjoy it longer, you should probably put it in the freezer.

Recipe
Oatmeal Buttermilk Wheat Bread
Ingredients:
1 1/4 cup rolled oats + 1/4 cup rolled oats separately
1 cup boiling hot water
1/4 cup room temperature water
2 tablespoons honey + 1 teaspoon honey separately
2 teaspoons instant yeast
1 1/2 cup buttermilk, room temperature
1/2 cup olive oil
2 1/2 cups whole wheat flour
2 1/2 cups all-purpose flour
2 teaspoons salt
Instructions:
Place the 1 1/4 cup oats in a bowl. Cover with the boiling hot water and stir well. Let sit uncovered for 10 minutes, stirring occasionally.
In the bowl of your stand mixer combine with the paddle attachment the soaked oats, the room temperature water, 2 tablespoons honey, yeast, buttermilk, olive oil, salt and 2 cups of each flour. Mix briefly until combined.
Mix in the remaining 1/2 cup of each flour.
Switch to the dough hook and knead on low speed for about 10 minutes. The dough will be wet and sticky and have a satiny finish.
Put the dough in a lightly oiled bowl, turn once to coat. Cover the bowl with plastic wrap and let rise in a warm place for about 1 hour or until doubled in bulk.
Put the dough on a lightly floured surface. With your hands gently push out the air bubbles.
Make a 12 x 6-inch rectangle with the dough and position it so the long side is facing you.
Fold the two shorter ends on the top of the dough, making sure they meet in the middle.
Starting with the end facing you, roll the dough away from you tightly into a log. Pinch the seams closed.
Transfer the loaf into an oiled loaf pan, making sure the dough has reached all the corners.
Mix a teaspoon of honey with 1/2 teaspoon of very hot water. Brush this over the top of the loaf and sprinkle on the 1/4 cup oats you set aside.
Let rise for 20-30 minutes until the loaf rises over the top of the pan.
Meanwhile preheat the oven to 190ºC (375ºF). I put the tray one notch lower than the middle. Bake the loaf for 1 hour.
Remove from the oven, take the bread out of the loaf pan and put on a wire rack to cool completely. If you can!

Tuesday, May 17, 2011
Self-frosting Nutella cupcakes
I'm gonna be really honest with you.... I'm not particularly taken by these cupcakes. Why do I post the recipe you ask? Because from the moment I baked these all I've heard is: "Mommy, can I have a Nutella-cupcake? Mommy, when are you gonna make those Nutella-cupcakes again? Those were reeeeaaally yummy." Yep, that's right... these cupcakes were an instant hit with my girls and that is why I'm posting the recipe.
It's basically a vanilla cupcake with a swirl of Nutella on top. I have to admit that I had a lot of trouble with swirling in the Nutella. The Nutella was much thicker than the batter. It was a bit too cold. So instead of self-frosting it became self-filling... Some of the Nutella stayed on top, but most of it just sunk into the batter and stayed there... hence: self-filling. But I guess that's what made this cupcake so popular with my girls. You start eating a cupcake and then suddenly there is a lovely filling of Nutella, what kid can resist that?
The next time I'm making sure the Nutella is softer so I can actually swirl the Nutella in!
I found this recipe over on Baking Bites, it is an adaptation of a recipe from Donna Hay.
Oh, in the comments over on Baking Bites, some people found the cupcakes to dry. There was some discussion over the amount of flour. In order to make sure I had the right amount I sifted the flour above a scale until I had the right amount. Works great! If you want to use cups, there is a big difference between 1 3/4 cup flour before it is sifted and 1 3/4 cup of sifted flour, so it works better to sift and then measure.
Recipe
Self-frosting Nutella Cupcakes
Yield: 12 cupcakes
Ingredients:
140 gram (10 tablespoons) butter, softened
3/4 cup sugar
3 eggs
1/2 teaspoon vanilla extract
200 gram (1 3/4 cup) sifted flour
1/4 teaspoon salt
2 teaspoons baking powder
About 1/3 cup Nutella
Instructions:
Preheat the oven to 170ºC (325ºF).
Fill a tray for 12 muffins with paper liners.
Beat together the butter and sugar until light and fluffy (about 2 minutes).
Add the eggs one at a time, beating until fully incorporated.
Add the vanilla and stir.
Add the flour, salt and baking powder and stir until well combined.
Fill the muffin tins 3/4 full. Spoon 1 1/2 teaspoon on top of each muffin. With a toothpick swirl in the Nutella, making sure to fold a bit of batter up over the Nutella.
Bake for 15-20 minutes.
Remove to a wire rack to cool completely. But if you can't wait that long....remember that the Nutella will be very hot! So try to keep it away from your kids.
Monday, May 16, 2011
Thin Crust Pizza Dough
For some time now I've been making my own pizza dough and to tell you the truth.... I had not thought it was so easy... I've tried out a couple of recipes, which all worked out great, but most of them were a little bready and I really like my pizza thin.
So, when looking for another recipe I found one at Smitten Kitchen. What appealed to me most was a picture where she was rolling out the dough with a rolling pin. Most pizza doughs are way too sticky to roll out with a rolling pin, but it looked okay! This opened the possibility to roll the dough very thin! I was sold. I immediately thought of some things I could put on top of the pizza and set to work. I have to say... I was very pleased with the end result. I'll definitely be using this recipe from now on! I did find the dough to be a bit salty, so I'm tuning that down next time. I also doubled the recipe, so I ended up with two pizzas, instead of one which works out better with the four of us.
Recipe
Thin Crust Pizza Dough
Yield: 1 pizza, not too big
Ingredients:
1 1/2 cup flour
1 teaspoon salt (or a little less)
3/4 teaspoon active dry yeast
1/2 cup lukewarm water
1 tablespoon olive oil
Instructions:
In a stand mixer stir the flour, salt and yeast briefly.
Add the water and olive oil and mix with the dough hook on low speed for two-three minutes.
Put the dough in a lightly oiled bowl, turn once to coat and cover the bowl with plastic wrap.
Let the dough rise for 1-2 hours until the dough has doubled in size.
Put the dough on a floured surface and gently press the air out.
Shape the dough into a ball, cover with plastic wrap and let rest for 20 minutes.
Sprinkle a pizza stone or baking sheet with cornmeal and preheat your oven to it's top temperature.
Roll out the dough and top with your favourite toppings and seasonings.
Bake for 8-10 minutes until the crust is slightly blistered and golden brown.
Sunday, May 15, 2011
Perfect Chocolate Ice Cream
With all the warm weather outside it really feels like summer already and so I decided to make my first batch of ice cream of the season. I'm always looking for a good Chocolate ice cream recipe and have tried several recipes, but this one is definitely a winner! It has everything you want a good chocolate ice cream to have. It's silky smooth, creamy and has a fantastic chocolate taste!
The only thing I hate about custard-base ice creams is that you have to let the base cool down before you can actually pour it into the ice cream maker. Not something I'm very good at.... To help speed this process I put the warm pan in a sink filled with ice cold water. But it is of course best to make it ahead.
I found the recipe at Joy of Baking and was so pleased with the end result that I made no changes whatsoever.
Recipe
Chocolate Ice Cream
Ingredients:
2 cups half-and-half (or 1 cup whole milk and 1 cup single cream)
50 gram (1/3 cup plus 2 tablespoons) dutch-processed cocoa powder
1/2 vanilla bean
55 gram (2 ounces) semisweet chocolate, chopped
4 large egg yolks
100 gram (1/2 cup) granulated sugar
Instructions:
In a saucepan whisk together the half-and-half and the cocoa powder until well blended.
Place the saucepan over medium-high heat and bring the mixture with the vanilla bean to a scalding point where the milk begins to foam up.
Remove the saucepan from the heat, take out the vanilla bean. Cut the vanilla bean in two, lengthwise, and scrape the seeds from the bean with the back of a knife. Mix the seeds back into the mixture.
Add the chopped chocolate and stir until the chocolate has completely melted.
In a stainless steel bowl beat the egg yolks and sugar until light and fluffy (about two minutes).
Very slowly pour the scalding half-and-half mixture into the egg yolk mixture, mixing constantly so the eggs don't curdle.
Place the bowl over a pan with simmering water. Stir constantly with a wooden spoon and cook until the mixture thickens and coats the back of a spoon (170ºF or 77ºC).
Immediately remove the mixture from the heat and keep stirring a few minutes so it doesn't overcook.
Cover the mixture with plastic wrap and let cool to room temperature and then refrigerate the mixture for several hours or overnight until completely cold. You can speed the process along by placing the mixture in a sink with ice cold water. And if you're really impatient you can skip the refrigerator, but your ice will be very soft.
Transfer the cold mixture to your ice cream maker and follow the manufacturer's instructions. After it is finished you can store the ice cream in the freezer.
Saturday, May 14, 2011
Madeleines

For years we've had a Madeleine tin lying in a kitchen cabinet, but I never used it. While looking through a cookbook of Donna Hay I read a recipe for Madeleines and thought: Why not?
It is a simple recipe, but one which no sane person would like to make using an electric handmixer. Or shall I say that when reading the recipe I was very glad I had a standmixer. The reason why I was glad, was because you have to mix the eggs and sugar 8-10 minutes. Like I said....I was very glad I had a standmixer I could use...
Also the recipe is for 24 Madeleines, but my tin is for 12 pieces. I decided to just make the mix and bake in two batches. I wouldn't do that again. The baking powder had already started working, so the second batch tasted not as good as the first. It might be handier to just use half the recipe.
That being said, the end result was very good. It tasted just like the ones we usually eat in France, so an instant summer/vacation feeling is at hand!
I made plain Madeleines, but you can easily adjust the recipe. It can be very versatile. You can simply add cocoa powder to the mix, or dip the Madeleines in a chocolate ganache. You can add raisins or raspberries. Whatever tickles your fancy!

Recipe
Madeleines
Yield: 24
Ingredients:
4 eggs
3/4 cup caster (superfine) sugar
1 1/4 cup flour
2 teaspoons baking powder
180 gram (6 oz) butter, melted and cooled
Instructions:
Preheat the oven to 180ºC (350ºF).
Mix the eggs and sugar with a standmixer for 8-10 minutes until very pale and thick.
Sift the flour and baking powder over the mixture and continue to beat at low speed until smooth.
Add the butter and beat until combined.
Grease two Madeleine tins with 12 x 1 1/2 tablespoon capacity holes. Spoon in the mixture and bake for 8-10 minutes until risen and golden.
Tuesday, May 10, 2011
Doughnutmuffins with jelly
I'm not good at making muffins. I somehow always over-stir the mixture and end up with massive, tough muffins. Why is it so difficult? I don't understand.... I never have any problem with cupcakes.
Because making muffins always ends in a disaster I haven't tried to make muffins in a while, but this week I thought I could give it another go. I found a recipe in "How to be a domestic Goddess" and thought why not?
I started making the batter and it looked okay! I was becoming more and more optimistic. Could this really work? Could it be possible that I had finally achieved making muffins? I put the muffins in the oven and waited until they were done. I then had to take the muffins out of the tray and roll them through melted butter and then through sugar. But as I tried to lift the muffins out of the tray I noticed something had gone wrong.... the jelly, which was supposed to have stayed in the middle of the muffins, had leaked down to the bottom... making it impossible to get the muffins out of the tray in one piece. All the muffins had a huge gaping hole on the bottom. Great....
But I was still determined to make this a success, albeit a slightly smaller success. So I rolled the muffins through the butter and the sugar. Let them cool for a while and called the girls. And then we tried the muffins... the girls liked them, but unfortunately I didn't. The same thing that always happens had happened again. The muffins were like a brick. Massif, tough and chewy.... with a large gaping hole in the bottom....
So I am currently trying to decide if I have to give muffins another go. Is it possible to create a batch of edible muffins or am I doomed to brick like muffins? Does it become easier with practice? If a recipe doesn't work for me I usually don't try it again. I don't like having to try a recipe again and again.
What to do...what to do...
Thursday, May 5, 2011
Miniature Gooey Chocolate Stacks
While looking through "How to be a domestic Goddess", I saw the recipe for the Gooey Chocolate Stack. I had read this recipe quite often but somehow never made it. Then suddenly it hit me. I could make this in miniature, so everyone has his/her own miniature gooey chocolate stack! So when my sister came over for dinner I immediately got to work!
The recipe is really quite easy and everything worked great. I decided to use half the recipe, because there were only five of us and the original recipe is for 10-12 people. I also used cornstarch instead of flour in the creme patissiere, because my sister is allergic to gluten. On the sheet of parchment paper I drew 15 circles for which I used a glass. Luckily for me this turned out to be perfect! I kept the original baking time, because I didn't have enough time to let it cool down in the oven, as our dinner still had to be prepared in the oven....
This is a great dessert and one you can easily prepare ahead of time. Just don't assemble the cake ahead of time, I think it will become soggy.When it's time for dessert all you have to do is spread the creme patissiere onto the meringue discs, sprinkle over some nuts et voila! It is impressive to see and fantastic to eat. Though if there are children involved it might get messy!
I completely forgot to take pictures, but then again.... I probably would not have survived the lynch that would have followed had I kept this dessert from my eaters that long...
Recipe
Miniature Gooey Chocolate Stacks
Yield: 5 miniature Gooey Chocolate Stacks
Ingredients:
For the meringue discs:
3 large egg whites
50 gram sugar
1 tablespoon cocoa powder
1/2 teaspoon red wine vinegar (I didn't have this, so I used ordinary, which worked great)
For the creme patissiere:
3 large egg yolks
50 gram sugar
1 tablespoon cocoa powder
1 tablespoon flour (or 1 1/2 scant teaspoons cornstarch)
100 millilitre whole milk
200 millilitre cream
50 gram good quality dark chocolate, melted
1/2 teaspoon vanilla
2 tablespoons pistachios, chopped
Instructions:
Preheat the oven to 140ºC (275ºF).
Line a big baking sheet or several baking sheets with parchment paper. Draw 15 small circles on the paper using a glass, or drinking cup.
Beat the egg whites until stiff, then add the sugar a tablespoon at a time, beating well after each tablespoon. Sprinkle over the cocoa and vinegar and fold in gently but firmly (meaning don't stir).
Divide the egg whites mixture over the circles, spread evenly. If you're up for it you can even use a piping bag.
Bake for 1 hour, turn the oven off and leave the meringues in the oven until cool. Or you can just take them out after the hour.
Beat for the creme patissiere the egg yolks and sugar together, add the cocoa and flour (or cornstarch), stirring well.
In a saucepan warm the milk and cream, then, while whisking continually, slowly pour the milk mixture onto the egg mixture.
Pour everything back into the saucepan, turn the heat back on, and stirring constantly, bring it to a boil.
When the mixture has thickened, take it off the heat and stir in the melted chocolate and vanilla.
Let it cool, but not in the refrigerator. Put plastic foil on the top so it doesn't form a skin. It will cool quicker if you put the saucepan in a sink filled with ice cold water.
To assemble one miniature cake, place one meringue disc on a plate. Spread one third of the chocolate cream on top. Put another disc on top of this. Spread one third of the chocolate cream on top. Repeat one more time.
Sprinkle the chopped pistachios on top.
Enjoy!
Wednesday, May 4, 2011
Potato packages with herbs for on the barbecue
I love baked potatoes, but I don't have the patience for actually making them on the barbecue. As a very good substitute I came up with these packages which have a much shorter preparation time and are wonderful to eat!
I usually use fresh rosemary and thyme because these grow in my garden and are always nice, but I think you can use all kinds of herbs, just let your imagination loose!
Recipe
For 1 potato package
Ingredients:
1 big potato
a small sprig of rosemary
a small sprig of thyme
1 clove of garlic
a teaspoon of butter
a piece of double aluminum foil, about 30x30 centimeter (11 inches x 11 inches)
Instructions:
Peel the potato and cut it in to cubes. Place the cubes on the foil. Add some rosemary and thyme. Cut the clove of garlic in 4 pieces and add these on top of the potatoes. Add a teaspoon of butter. Fold the foil together, making sure it is well sealed. Place on the barbecue. Depending on the heat it takes about 10-20 minutes till it's done.
When the potatoes are done open the package and enjoy the heavenly smell! The taste of the herbs will really have gotten into the potatoes!
Tuesday, May 3, 2011
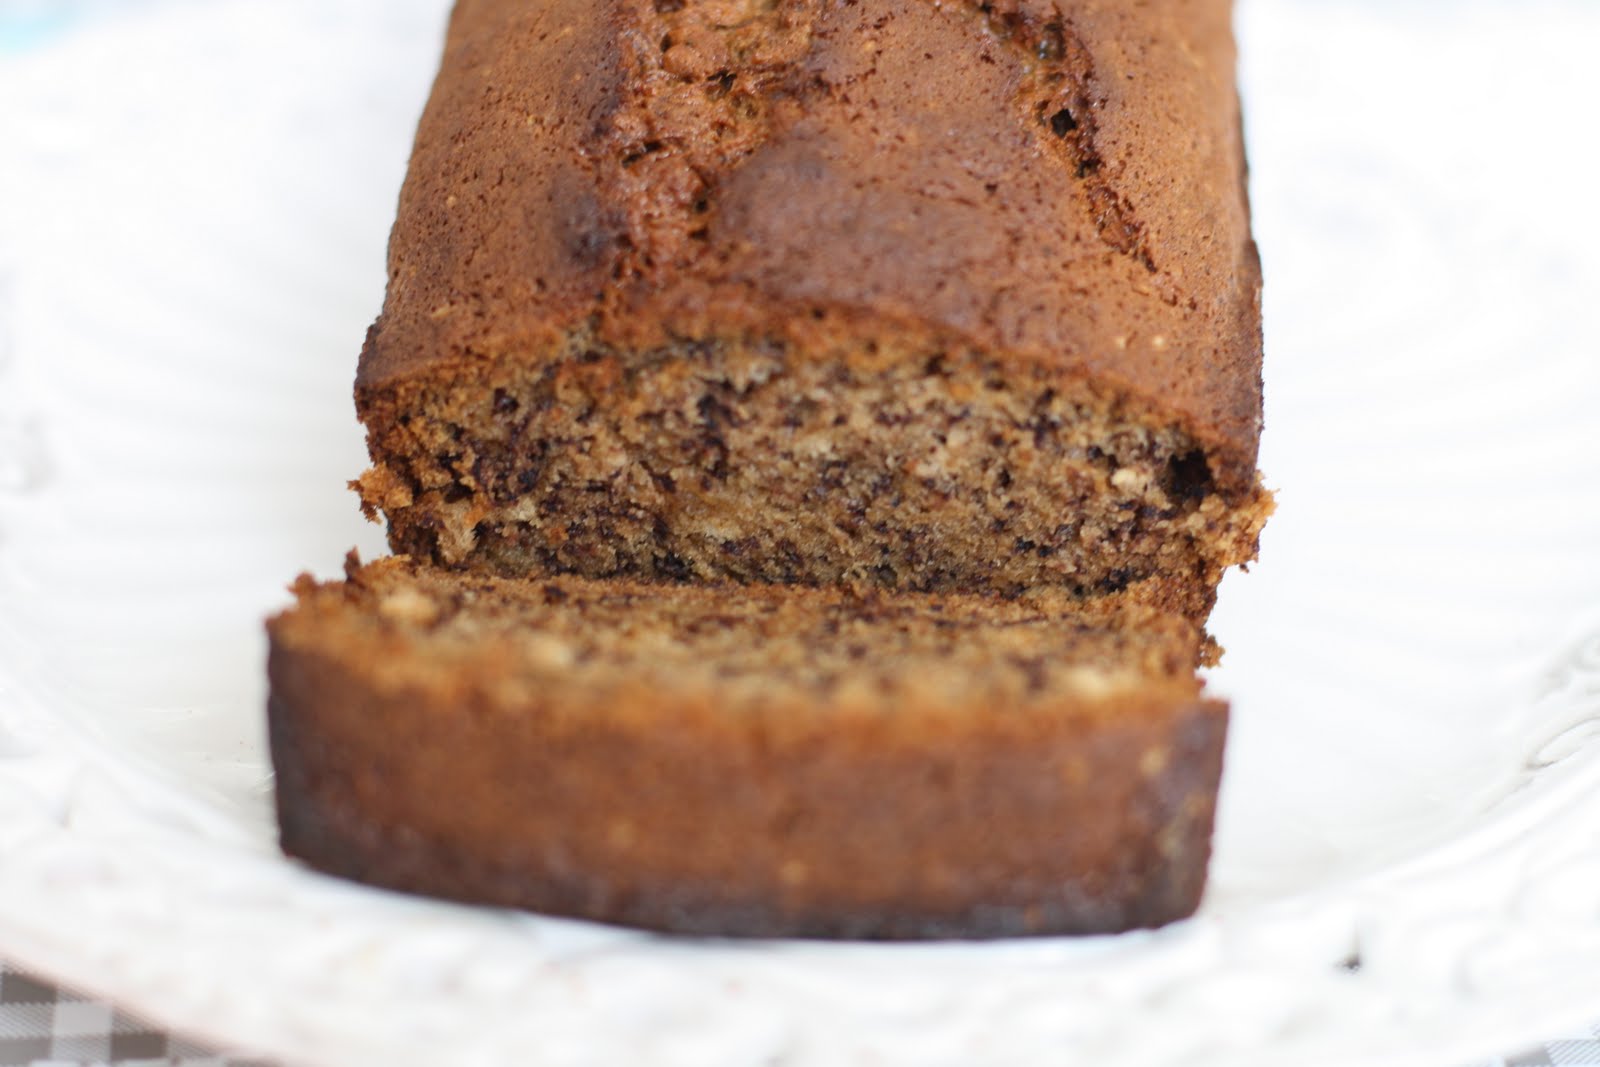
Banana Bread

So, when I suddenly found myself with a whole bunch of very ripe bananas, I was shocked. And then I danced with joy! Now I could finally bake something with bananas again! I decided not to leave anything to fate and began a search for a nice banana recipe. For some time I've been thinking about a banana bread and so with a mission I searched through cookbooks and online.
After looking over several recipes, I found a winner: jacked-up banana bread by Smitten Kitchen. I've read some of her recipes before, but had never actually made one. So I was curious to see if the recipe would turn out okay. It did.
It was warm, moist, full of flavor, the top was slightly crunchy and it was gone all to soon.... I didn't add the bourbon, but that was mostly because I didn't have any. I think adding chopped walnuts would go great with this recipe, but unfortunately... I didn't have any. Maybe next time! Because I will definitely make this again. It was so easy. It doesn't require a mixer, you can just stir everything by hand... or you can be like me and let your baby girl do all the stirring. That's how easy it was!
I used hot air circulation on my oven which shortened the baking time by 10 minutes. I think it would go better with out the hot air circulation.
The top was slightly too dark. But all in all I was very pleased with the end result!

Recipe
Banana Bread
Ingredients:
3 to 4 ripe bananas, mashed
1/3 cup melted butter
3/4 to 1 cup light brown sugar (depending on the level of sweetness you prefer)
1 egg, beaten
1 teaspoon vanilla
1 tablespoon bourbon (optional)
1 teaspoon baking soda
1/2 teaspoon salt
1 teaspoon cinnamon
1/2 teaspoon nutmeg
Pinch of ground cloves
1 1/2 cup flour
Instructions:
Preheat the oven to 350°F.
With a wooden spoon, mix butter into the mashed bananas in a large mixing bowl.
Add the sugar, egg, vanilla and bourbon, mix, then add the spices and mix again.
Sprinkle the baking soda and salt over the mixture and mix in.
Add the flour, mix. Pour mixture into a buttered 4×8 inch loaf pan.
Bake for 50 minutes to one hour, or if you use hot air circulation 40 minutes, until a tester comes out clean. Cool on a rack. Remove from pan and slice to serve.
You can start eating when it's still warm but it also tastes great cold!
Subscribe to:
Posts (Atom)