A 30-something old girl trying to figure out what to do with her life.... HELP!!!!
Monday, May 28, 2012
Chocolate Chip Pancakes with Vanilla Strawberries
On weekdays we never have the time to make much of breakfast. Erik leaves really early (and I mean reaaaaly early) and I'm not much of a morning person. I try to keep it as simple as possible so my head can process what is going on and make sure everything gets done on time.
But in the weekends I do love to make a bit more work of breakfast. This isn't always possible, but I'm always so happy when I can give my family something special, and more importantly, something delicious.
These pancakes are, despite the long title, easy to whip up. They are fluffy and flavourful, filled with chocolate chips (because, let's face it... what doesn't taste better with a bit of chocolate in it?) and the strawberries are divine and go great with these pancakes. And although it isn't shown in the pictures....we topped these pancakes off with a bit of whipped cream, making it a bit over the top. It feels like you're eating a dessert for breakfast and well...who doesn't like that!
Recipe
Chocolate Chip Buttermilk Pancakes with Vanilla Strawberries
Yield: a lot of pancakes, we even had some leftovers...
Ingredients:
For the pancakes:
2 eggs
2 cups flour
2 tablespoons sugar
2 teaspoons baking powder
1 teaspoon baking soda
1/2 teaspoon salt
2 cups buttermilk (or 1/2 cup milk and 1 1/2 cup plain yogurt)
4 tablespoons butter, melted and cooled
1/2 teaspoon vanilla extract
3/4 cup chocolate chips
For the strawberries:
1 pint strawberries
2-4 teaspoons vanilla sugar (or 1/4 vanilla bean and 2-4 teaspoons sugar)
Instructions:
Start by cutting the strawberries into slices. Put the sliced strawberries in a bowl and add the vanilla sugar (I always keep a jar handy, just fill a jar with regular sugar and stuff in some vanilla beans which have been scraped empty of the seeds. Every time I have a leftover empty vanilla bean I replace the ones in the jar with these) or scrape the seeds out of 1/4 vanilla bean and add regular sugar. Mash everything together a bit (not too much!) and put the strawberries aside, so they can release their juices and the sugar can dissolve.
Beat the eggs in a large bowl. Add the buttermilk (or milk and yogurt), melted butter and vanilla and mix well.
Add the flour, sugar, baking powder, baking soda and salt and mix together until almost smooth.
Fold in the chocolate chips and let the batter rest for several minutes.
Over medium heat, heat a pan or griddle. Add a little butter or oil.
Pour the batter onto the pan and cook until bubbles start to form that pop. Flip the pancake with a spatula and cook until the other side is golden brown. Repeat with the rest of the batter. The amount of batter that you use depends a bit on how big you want your pancakes to be. I like my pancakes to be a bit bigger, so I use a small ladle, but you can make yours smaller and add about 2 tablespoons of batter to the pan.
To serve the pancakes, top them with the strawberries and a dollop of whipped cream!
Source: slightly adapted from Joy the Baker
Tuesday, May 22, 2012
Simple Brownies
Every self-respecting human has to have a go-to brownie recipe. Mine is simple, uses staple ingredients and the end result is always delicious. Fudgey and chocolatey, everything a brownie needs to be. This version is plain, but you can add raisins, chocolate chips, nuts or whatever catches your fancy!
The recipe calls for oil instead of butter, but don't be afraid, it is still moist. A combination of cocoa powder and melted chocolate creates a great chocolate flavour and raw cane sugar makes it extra gooey (or sticky? I never know the right word to describe a brownie). It is easy to whip up if you need a last minute treat!
Recipe
Brownies
Yield: about 16 small pieces
Ingredients:
150 gram (1/2 cup) bittersweet chocolate, chopped
120 ml (1/2 cup) canola oil
215 (1 cup) gram raw cane sugar
2 eggs
1 teaspoon vanilla extract
65 gram (1/2 cup) self-raising flour
4 tablespoons Dutch-processed cocoa powder
Additional: chopped nuts, chocolate chips, raisins, etc.
Instructions:
Preheat the oven to 180˚C (350˚F). Lightly grease a brownie pan.
Melt the chocolate au bain marie.
Whisk together the oil, sugar, eggs and vanilla.
Add the melted chocolate and mix until well combined.
Sift the flour and cocoa powder over the mixture and fold it through.
At this point you can fold in any additional ingredients.
Pour the mixture into the brownie pan. Make sure the batter is spread evenly.
Bake the brownie for 30-35 minutes. Let the brownie cool in the pan. After it has cool, cut it into pieces.
Thursday, May 17, 2012
Rocky Road Ice Cream
For some bizar reason it feels as if spring and summer do not want to come. Where last year March, April and May were filled with sunshine and warmth, this year we've had about two nice days so far... It is frustrating and depressing.
In an attempt to put some sunshine into our hearts I decided to make ice cream. Because frankly, who doesn't become happy from fresh home made ice cream? Right? Right! And being the chocolate addict that I am, of course I had to pick a chocolate ice cream! That makes me even happier!
Unfortunately, the ice cream was gone all too soon, but....fortunately I'm writing this post with the sun shining outside. It's not very warm, but it's a start! So I'm off to enjoy some sunshine!
Recipe
Rocky Road Ice Cream
Yield: about 1 quart
Ingredients:
2 cups heavy cream
3 tablespoons unsweetened Dutch-process cocoa powder
5 ounces bittersweet chocolate, chopped
1 cup whole milk
3/4 cup sugar
Pinch of salt
5 large egg yolks
1/2 teaspoon vanilla extract
1 1/2 cup miniature marshmallows
1 cup roasted peanuts
Instructions:
In a medium saucepan warm 1 cup of the cream with the cocoa powder, whisking thoroughly to blend. Bring the mixture to a boil, reduce the heat and let simmer for about 30 seconds, while whisking constantly. Remove the pan from the heat, add the chopped chocolate and stir until smooth. Stir in the remaining cup of cream. Pour the mixture into a large bowl.
Warm the milk, sugar and salt in the same saucepan. In a seperate medium bowl whisk together the egg yolks. Very slowly pour a little of the warm milk into the egg yolks, while whisking constantly. Keep slowly adding the milk and whisking until it is completely combined. Pour the mixture back in to the saucepan.
Stir the mixture constantly over medium heat, scraping the bottom as you stir. until the mixture thickens and coats the back of the spatula. Pour the custard through a strainer into the chocolate mixture and stir the mix well. Add the vanilla. Stir until cool over an ice bath.
Chill the mixture thoroughly in the refrigerator, then freeze in your ice cream maker according to the manufacturer's instructions.
After the ice cream is ready fold in the marshmallows and peanuts.
Source: The Perfect Scoop by David Lebovitz
Thursday, April 19, 2012
Double Chocolate Raspberry Cupcakes
Like many women, I too have a serious chocolate addiction. I prefer to eat chocolate everyday. I know this is not the smartest thing to do, so I try to restrain myself as much as possible. But there are times when I, like the best of us, cave. Especially when I run into a recipe like Double Chocolate Raspberry Cupcakes. It goes without saying that I'm already hooked when reading a title that contains Double Chocolate, but I have to admit that I love the combination of chocolate and raspberry.
So I caved and made these cupcakes. And you know what? I am so glad I did, because these cupcakes are a little piece of heaven! No, I am not exaggerating... they are fluffy, moist, almost light as air, with an amazing chocolate flavour. Inside you find that fresh, slightly tangy flavour of the raspberries and the whole thing is covered with ganache! Like I said... a little piece of heaven....
I know these cupcakes lack the outer display of raspberries, but the reason for this is simply that I didn't have any fresh raspberries on hand. I used frozen for the filling, but they don't look nice enough for the decoration on top, so I decided to just skip that. It's maybe even more fun this way, because people expect to eat a chocolate cupcake and are surprised when they taste the raspberry filling. Makes it a little bit more fun!
If you love chocolate, or have a serious chocolate addiction, go make these! You have my blessing!
Recipe
Double Chocolate Raspberry Cupcakes
Yield: 24-28 cupcakes
Ingredients:
For the cupcakes:
3 oz. semisweet chocolate, finely chopped
1 1/2 cups hot brewed coffee
3 cups sugar
2 1/2 cups all-purpose flour
1 1/2 cups Dutch processed cocoa powder
2 teaspoons baking soda
3/4 teaspoon baking powder
1 1/4 teaspoon salt
3 large eggs
3/4 cup vegetable oil
1 1/2 cups buttermilk or yogurt
3/4 teaspoon vanilla extract
For the filling:
12 oz. frozen raspberries, thawed
1/4 cup sugar
1 tablespoon cornstarch
For the frosting:
12 oz. bittersweet or semisweet chocolate, finely chopped
3/4 cup heavy cream
1 1/2 tablespoons sugar
1 1/2 tablespoons corn syrup
3 tablespoons unsalted butter, at room temperature
Instructions:
Preheat the oven to 180˚C (350˚F). Line cupcake pans with paper liners.
Put the chopped chocolate in a medium bowl and add the hot coffee. Let stand for 2 minutes and whisk until the chocolate is melted and incorporated in the coffee.
In a separate large bowl mix together the sugar, flour, cocoa, baking soda, baking powder and salt.
Beat the eggs on medium-high speed in the bowl of an electric mixer until slightly thickened and pale yellow. Gradually add the oil, buttermilk or yogurt, vanilla extract and coffee-chocolate mixture to the eggs, making sure it is well blended.
Add the dry ingredients and mix until just incorporated.
Divide the batter between the paper liners, filling them about 3/4 full.
Bake for 18-20 minutes, until a toothpick inserted in the middle comes out clean. Let the cupcakes cool for 5-10 minutes in the pans, before transferring them to a rack to cool completely.
To make the raspberry filling, puree the raspberries in a blender. If you want to remove the seeds (which I recommend) strain the mixture through a fine sieve. Put the puree in a small saucepan and whisk in the sugar and cornstarch. Bring the mixture to a boil, stirring frequently. Once the mixture has thickened, remove the pan from the heat. Let the mixture cool before use.
To make the ganache, add the chopped chocolate to a medium heatproof bowl. Combine the cream, corn syrup and sugar in a saucepan and heat until it starts boiling. Immediately pour the mixture over the chopped chocolate and let stand for 2 minutes. Whisk the mixture carefully until it is smooth and well blended. Add the butter 1 tablespoon at a time, whisking until completely incorporated. Let the ganache cool to room temperature to thicken so it can be spread. If you want to speed up this process put the bowl in the refrigerator, stirring every 5-10 minutes, until it has reached the desired thickness.
Once you have made all the elements it is time for the assembly! Put the raspberry filling in a pastry bag, fitted with a plain fine tip or a special tip for filling, if you have one). Just stick the tip of the pastry bag in the top of a cupcake and pipe in some filling. If you're not sure how much to use, go easy and if you have filling left at the end, just make another round. You don't need more than a few teaspoons of filling for each cupcake.
Spread the ganache over the tops of the cupcakes with a knife or an offset spatula. Allow the ganache to set completely before serving.
Source: barely adapted from Annie's Eats
Friday, April 6, 2012
Triple Chocolate Oreo Chunk Cookies
Triple Chocolate Oreo Chunk Cookies |
I was afraid the recipe would give me way too much cookies, so I decided to make half the recipe. What was I thinking?! They were gone way too soon and I felt really stupid for not just making a whole batch. Next time I will definitely make more, much more! And I think I'll make these again really soon...and by soon I mean I think I have to go make some right now.....
Triple Chocolate Oreo Chunk Cookies |
Recipe
Triple Chocolate Oreo Chunk Cookies
Yield: about 3-4 dozen cookies
Ingredients:
2 1/2 cups flour
1 teaspoon baking soda
1/4 teaspoon salt
3/4 cup Dutch processed cocoa
1 cup butter, room temperature
1 cup sugar, granulated
1 cup light brown sugar
2 large eggs
2 teaspoons vanilla extract
1 cup chopped white chocolate
1 cup chopped semi-sweet chocolate
1 cup chopped Oreo cookies
Instructions:
Preheat the oven to 190˚C (375˚F) and line a baking sheet with a silicone mat or parchment paper.
Sift together the flour, baking soda, salt and cocoa in a medium bowl and set aside.
Cream together the butter and sugars with a mixer until smooth. Add the eggs, one at a time. Add the vanilla extract and mix until blended.
Gradually add the flour mixture to the wet mixture and mix until the flour disappears. Stir in the chopped chocolates and Oreos. This works best if you do it by hand.
Drop tablespoons of cookie dough onto the baking sheet, leaving about 2 inches between the cookies.
Bake the cookies for 8-10 minutes in the oven. Remove the baking sheets from the oven and let the cookies cool for 3-5 minutes on the baking sheet before removing them to a rack to cool completely.
Triple Chocolate Oreo Chunk Cookies |
Source: Two Peas and their Pod
Thursday, October 6, 2011
Coffee Chocolate Macarons
I know, I know, everybody has been posting about macarons. I know that it isn't very original to post about it. But I don't care. I love macarons. I really do. So I don't care what you think about this post. Okay, I admit I really do care about what you think, but you gotta cut me some slack. I love macarons and so I am going to write about them.
This is my first time ever making macarons and to tell you the truth....I was scared. Really scared. This summer, while eating my way through France, I bought a beautiful book about macarons. I read the entire book (well, the words I could understand.... my French isn't very good). I read some more on the internet. And then I read some more on the internet. I just love Google!
Every time I thought about making macarons I found an excuse not to make them. But I finally gathered all my courage and just jumped. And you know what? I was pleasantly surprised. The actual making isn't very difficult, it's just a tricky batter that makes it difficult. Let me put your mind at ease. They weren't perfect.
I overmixed the meringue and I overmixed the batter (hmmm.... am I detecting a patron? Surely not?). When I was baking the cookies I had to let them in the oven for a lot longer. When the cookies had cooled off they were a bit chewy and tough.... not exactly the result I was going for. And of course they didn't have the pretty feet you expect in a good macaron. But despite that they still tasted good, so I decided to finish them with a ganache. No surprises there.
The big surprise came actually the next day. For some mysterious reason the cookies were absolutely perfect the next day. The texture had changed from chewy and tough into crunchy on the outside, but soft and light on the inside. How is that possible? Maybe it had something to do with the ganache? I have absolutely no idea, but I also don't really care.
So all in all I am very pleased with the end result and can't wait to make more macarons. (what? More macarons? Yes, more macarons. Don't hate me for it...). Oh, and I can't really tell you how much macarons this recipe makes, because mine were a bit on the (really) big side. If you need a bit more info on macarons I can recommend the blog of Tartelette, the queen of macarons.
Recipe
Coffee Chocolate Macarons
Ingredients:
For the cookies:
90 grams egg whites (about 3, 1-2 days old, room temperature)
30 grams granulated sugar
200 grams confectioners' sugar
110 grams almonds
1 teaspoon espresso powder
For the filling:
3/4 cup heavy cream
1 cup bittersweet chocolate, finely chopped
2 teaspoons espresso powder
Instructions:
Line the baking sheets with parchment paper or silicone mats.
Whip the egg whites into a foam in a stand mixer with the whisk attachment.
Gradually add the sugar so the egg whites turn into a glossy meringue. Don't overbeat the meringue.
In a foodprocessor mix the almonds, confectioners' sugar and espresso powder until the almonds are very finely ground. If you want you can sift the mixture to make sure there are no big pieces left.
Add the almond mixture to the meringue.
Start with a quick mix in, then slow down. The batter should still be thick but should also be able to form a slight ribbon.
Fill a pastry bag fitted with a plain tip with the batter and pipe small rounds onto the baking sheets.
Preheat the oven to 150˚C (300˚F).
Let the macarons sit on the counter for 30-60 minutes.
Bake the macarons for 15-20 minutes. Let cool.
Bring the heavy cream to a boil in a small saucepan.
Put the chopped chocolate with the espresso powder in a bowl.
Pour the boiling heavy cream over the chocolate and let sit for 2 minutes.
After 2 minutes gently stir the mixture until all the chocolate has melted.
Let the ganache cool down until it is thick enough to pipe.
Pair the cookies to make sure they have the same size.
Fill a pastry bag fitted with a plain tip with the ganache.
Source: adapted from Tartelette
Tuesday, October 4, 2011
Split-Level Pudding
I can't remember the last time I had homemade pudding. I really can't. And when I think about pudding it doesn't make me very happy. But somehow, while reading Baking, from my home to yours, I found myself lingering at the pudding recipes. Especially the vanilla-chocolate pudding appealed to me and so I decided to make some.
I think it was the first time I ever made pudding and I have to say I was pleasantly surprised. The recipe worked really well and the taste and structure are exactly as you would expect. It is a handy dessert because you have to prepare it in advance and of course serving it in one-person sized ramekins never hurt anybody.
Oh, and don't worry... I don't have incredible small hands and don't walk around with chipped nailpolish on my fingers. Azira was kind enough to assist me. And of course for her it is okay to walk around with chipped nailpolish on her fingers.... just so you know.
Recipe
Split-Level Pudding
Yield: 6 servings
Ingredients:
For the chocolate layer:
2 ounces bittersweet chocolate, finely chopped
1/3 cup heavy cream
For the vanilla layer:
2 1/4 cups whole milk
6 tablespoons sugar
3 tablespoons cornstarch
1/4 teaspoon salt
3 large egg yolks
2 tablespoons butter, cut into 4 pieces, room temperature
2 1/2 teaspoons vanilla extract
Instructions:
Set out 6 ramekins or pudding cups, each holding 1/2-3/4 cup.
Put the chocolate in a small bowl.
Bring the heavy cream to a boil and pour it over the chocolate.
Let sit for 2 minutes, then gently stir to blend.
Divide the chocolate ganache among the cups and set aside.
Bring 2 cups of milk and 3 tablespoons of sugar to a boil in a medium saucepan.
Meanwhile, put the cornstarch and salt in a food processor and blend. Set aside.
Put the remaining sugar and the egg yolks in the processor and blend for 1 minute.
Add the remaining 1/4 cup of milk and pulse briefly to mix. Add the dry ingredients and pulse again to mix.
Let the machine run and slowly add the hot milk mixture.
Process for a few seconds, then pour everything back in the saucepan.
Put the pan over medium heat and whisk continuously until the pudding thickens and start to bubble.
Don't let the pudding boil.
Put the pudding back into the food processor and pulse a couple of times.
Add the butter and vanilla and pulse until everything is well blended.
Divide the pudding over the cups. The chocolate might come up along the sides, but that doesn't matter.
Press a piece of plastic wrap against the surface of each pudding to create an airtight seal.
Refrigerate the puddings for at least 4 hours.
Source: Baking, from my home to yours by Dorie Greenspan
Wednesday, September 28, 2011
Devil's Food Cake with Chocolate-Orange Buttercream
For my mother's birthday I had planned to bake this cake, unfortunately I wasn't feeling good enough, so I had to let it go. But by that time the cake had managed to wriggle into my head and under my skin. I couldn't let go of it. I had so looked forward to making it. So I asked my self: Why not just make it? I mean... do you really need a special occasion to make a cake? Well, it is usually better to have a good reason, because otherwise I'd be baking cakes like this all the time and I'm pretty sure my hips would not agree with that.
But because I had been looking forward to this cake for a while I decided to just bake it and let the pounds fall where they may.... And I have to tell you... I'm glad I did. This is one good cake. Moist, fluffy, flavorful and chocolatey. Just the way I like it! And the frosting... oh my god that frosting is sooooooooo good. I had a hard time trying to restrain myself and not just eat the whole bowl up! That really would have added a lot of pounds!
Though the flavor of the frosting is quite orangy it isn't overwhelming and you can still taste the cake. It really is a great combination!
The recipe called for two 9-inch cake pans, which I didn't have. I used two 8-inch spring pans and had to add quite bit more baking time, but I actually think it turned out better. It made for a beautiful high layered cake which looks very impressive but is really not that hard to put together.
So if you have a special occasion coming up (or not) or just want to score points with a chocolate-lover, this cake will do the trick!
Recipe
Devil's Food Cake with Chocolate-Orange Buttercream
Ingredients:
For the cake:
4 ounces bittersweet or semisweet chocolate, chopped
1 1/2 cup flour
1/2 cup unsweetened cocoa powder
1 teaspoon baking powder
1/2 fine sea salt
1/4 teaspoon baking soda
1/2 cup whole milk
1/2 cup plain whole-milk yogurt
1 1/2 cup (packed) golden brown sugar
1 1/2 stick butter, room temperature
4 large eggs
For the frosting:
8 ounces bittersweet or semisweet chocolate, chopped
1/2 cup unsweetened cocoa powder
7 tablespoons water (or more)
3 sticks butter, room temperature
2 cups confectioners' sugar
zest of 1 orange
2 teaspoons vanilla extract
1/2 teaspoon fine sea salt
Instructions:
Preheat the oven to 170˚C (325˚F).
Butter and flour the sides two 8-inch spring pans. Cover the bottom with parchment paper.
Melt the chocolate in a double boiler until smooth. Remove from the heat and let cool to barely lukewarm.
Over a medium bowl sift together the flour, cocoa powder, baking powder, salt and baking soda.
In a small bowl whisk together the milk and yogurt.
In a stand mixer with the paddle attachment beat together the sugar and butter until smooth.
Beat in the eggs, 1 at a time.
Mix in the melted chocolate until smooth.
Mix in the dry ingredients alternately with the milk mixture, in 3 additions each.
Divide the batter between the two pans.
Bake the cakes for 50 minutes, until a toothpick inserted in the center comes out clean. (If you're using 9-inch pans, bake for 30 minutes.)
Let the cakes cool in the pans for 15 minutes, then turn the cakes out onto racks. Remove the parchment paper from the bottom and let the cakes cool completely.
To make the frosting, melt the chocolate in a double boiler until smooth. Let cool to barely lukewarm, but still pourable.
In a small saucepan mix together the cocoa powder and water. Stir over medium-low heat until smooth and thick but still pourable. If necessary add more water by teaspoonsful. Let cool.
Beat together the butter, 1/3 cup of confectioners' sugar and the orange zest.
Add the melted chocolate, vanilla and salt and beat again until smooth.
Beat in the cocoa mixture.
Gradually add the remaining 1 2/3 cups of confectioners' sugar and beat until the frosting is smooth.
Cover the sides of your platter with 4 strips of parchment paper.
Place 1 layer of the cake on top of the platter and spread a thick layer of frosting on top of the cake.
Carefully place the second cake on top.
Spread the remaining frosting over the top and sides of the cake, making swirls as you go.
Remove the strips of parchment paper and serve the cake at room temperature.
Source: slightly adapted from Bon Appetit
Monday, September 12, 2011
Snickery Squares
Fall has only just started and already I have caught my first cold of the season. Great. So these past few days have mostly been spent resting. Luckily I'm already starting to feel much better. The fever is gone and I can breath much easier!
When I'm feeling sick I love eating some comfort food and comfort food for me is not chicken soup, but something with chocolate! I found a nice recipe that didn't require me to do too much work and which filled all my needs! You can easily cut this recipe into three parts, making it seem as if you barely have to do anything at all! I just love that in a recipe!
Recipe
Snickery Squares
Yield: 16 squares
Ingredients:
For the crust:
1 cup flour
1/4 cup sugar
2 tablespoons confectioners' sugar
1/4 teaspoon salt
1 stick butter, cold, in small pieces
1 large egg yolk
For the filling:
1/4 cup sugar
2 tablespoons water
1 cup salted peanuts
3/4 - 1 cup dulce de leche
For the topping:
7 ounces bittersweet chocolate, coarsely chopped
1/2 stick butter, room temperature, in 8 pieces
Instructions:
Preheat the oven to 180˚C (350˚F). Butter an 8-inch square pan and put it on a baking sheet.
Start with making the crust. In a food processor combine the flour, sugar, confectioners' sugar and salt. Add the pieces of butter and pulse until it resembles coarse meal.
Pour the egg yolk over the ingredients and pulse until the dough forms clumps and curds. Stop before the dough comes together in a ball.
Turn the dough into the buttered pan and gently press it evenly across the bottom of the pan.
With a fork prick the dough all over.
Slide the pan with the sheet into the oven and bake for 15-20 minutes, until it takes on just a little color around the edges.
Transfer the pan to a rack and let cool to room temperature before filling.
To make the filling line a baking sheet with parchment paper or a silicone mat.
Put the sugar and water in a thick-bottomed saucepan and cook over medium-high heat, stirring, until the sugar dissolves.
Keep the heat fairly high and continue to cook until it just starts to color.
Add the peanuts and, with a long spoon, immediately start stirring to coat the peanuts.
The peanuts will turn white. Keep stirring until the sugar turns back into caramel and the nuts are coated with a nice deep amber caramel.
Remove the pan from the heat and spread the nuts out onto the prepared baking sheet. Let cool to room temperature.
When the nuts are cool enough break them into pieces, making the nuts as loose as possible.
Stir 3/4 of the peanuts into the dulce de leche and spread this mixture over the crust.
Chop the rest of the peanuts finely.
To make the topping melt the chocolate in a heatproof bowl over a pan of barely simmering water.
Remove the chocolate from the heat and gently stir in the butter, until the butter is completely blended into the chocolate.
Pour the chocolate over the dulce de leche. Smooth the top and sprinkle the finely chopped peanuts over it.
Put the pan into a refrigerator for 20 minutes. If you'd like to serve them cool, keep them refrigerated for at least 3 hours.
Cut into 16 squares.
Source: Slightly adapted from Baking, from my home to yours, by Dorie Greenspan
Sunday, August 28, 2011
Death by Chocolate Mousse
It takes more time to make and is a little more complicated, but once you get the hang of it that won't be a problem anymore. And after you taste this chocolate mousse you'll know it was totally worth the effort. Because it tastes divine. It is chocolate at it's best. It is so good you can't stop eating it, even when you know you really shouldn't eat any more. It's that good!
I usually make one big bowl, but this is also very nice in smaller bowls, so you get individual portions. It is a perfect dessert for a fancy dinner party. You have to prepare it ahead and it is so good your guests will love it. All you have to do is add a bit of whipped cream and your done!
For this chocolate mousse it is important to use a good quality chocolate. And it is made with raw eggs so keep in mind it is not suitable for everybody.
Recipe
Chocolate Mousse
Yield: enough for 8 persons
Ingredients:
4 egg yolks
3/4 cup caster sugar
6 ounces bittersweet chocolate, use a good quality
4 tablespoons strong coffee
1 1/2 stick softened butter
4 egg whites
Pinch of salt
1 tablespoon caster sugar
Instructions:
In a heatproof bowl beat together the egg yolks and sugar until it is thick, pale yellow and forms a slowly dissolving ribbon.
Put the bowl over a pot of simmering water and beat for 3-4 minutes until it is foamy and hot.
Put the bowl over cold water and beat again for 3-4 minutes until the mixture has cooled off and forms again a slowly dissolving ribbon. It should have the consistency of mayonaise.
In a double boiler melt the chocolate with the coffee until completely smooth.
Remove from the heat and beat in the butter a bit at a time.
Mix together the egg yolk mixture and chocolate mixture until smooth. Make sure the chocolate mixture is still slightly warm, this will help with making the mixture smooth.
Beat the egg whites with the salt until soft peaks are formed. Sprinkle the tablespoon of sugar on the egg whites and continue to beat until stiff.
Stir one fourth of the egg whites into the chocolate mixture.
Gently fold in the rest of the egg whites.
Pour the mixture into a bowl or several small bowls and refrigerate for at least two hours.
Serve with whipped cream.
Source: slightly adapted from Julia Child, Mastering the Art of French Cooking
Monday, August 15, 2011
Banana Cake with Chocolate Glaze
I recently discovered a new blog that I think I'm going to like very much! It is the blog of The Pastry Affair. So far I've tried only one recipe, but I think that is going to change very soon....
It all started out with a delicious looking Banana Cake with Chocolate Glaze. The great thing about this cake is that is looks fantastic because of the chocolate glaze, but is extremely easy to make. Now I know that the picture isn't great, but I really didn't stand a chance... I put the glaze on right after dinner because I had been to busy earlier and then when the cake was finished two girls demanded to eat it. RIGHT NOW!
Please don't let that put you off of this cake. It is moist, flavorful and the chocolate glaze makes it sinfully delicious! And because it is so easy to make, it makes for a great weekday dessert! It'll also work great if you want to impress someone...
Recipe
Banana Cake with Chocolate Glaze
Ingredients:
Banana Cake
2 1/2 cups flour
1 tablespoon baking powder
1 teaspoon cinnamon
1/2 teaspoon salt
1/2 cup butter, room temperature
1/2 cup granulated sugar
3/4 cup brown sugar
2 large eggs
3 overripe bananas, mashed
1 teaspoon vanilla extract
3/4 cup buttermilk
Chocolate Glaze
12 ounces semi-sweet chocolate
1/2 cup butter
Instructions:
Preheat the oven to 170˚C (325˚F).
Grease two 20 cm (8-inch) baking pans.
In a medium bowl stir together the flour, baking powder, cinnamon and salt.
In a different bowl, mix the butter and two sugars together until light and fluffly.
Add the eggs, one at a time, beating well after each addition.
Add the bananas and vanilla and mix together.
Beat in the flour and buttermilk in 5 additions, starting and ending with the flour.
Divide the batter evenly between the two baking pans.
Bake for 35-40 minutes, until golden and a toothpick inserted in the middle comes out clean.
Let the cakes cool for 10 minutes before removing them from the baking pans.
Let the cakes cool completely before frosting.
In a double boiler melt the chocolate and butter until smooth.
You might need to let it cool slightly until it is thick enough to spread. But don't let it cool too long or it will be difficult to spread.
Start with glazing the top of the bottom cake. Put the second cake on top of the first cake. Now glaze the rest of the cakes.
Enjoy!
Thursday, July 28, 2011
Peanut Butter Oatmeal Chocolate Chip Cookies
When Nikki was invited for a sleep-over party by her cousin she jumped up and down for about an hour! She was extremely excited. Her cousin, Phoebe, is two years her senior, but there is a real click with all three of the girls. Whenever they get together, they get really excited and love spending time together.
As a thank-you gift I wanted to bake something yummy for her to take along to her cousin and my sister. Unfortunately I had about two hours in which to make that thank-you gift and no time to go shop for ingredients.
And so I searched through my cabinets and assembled a variety of ingredients. I then turned to my new book: Baking, From my home to yours, and found a great easy recipe for Peanut Butter Oatmeal Chocolate Chip Cookies, for which I had all the ingredients. I just love it when I find recipes that you can make with standard ingredients. It gives me the opportunity to whip something up on any given time!
I have to admit I had my doubts about these cookies. I have never baked with peanut butter, so I wasn't sure if it would taste good. But I am now converted. The peanut butter gives these cookies a full, rich flavour, which of course goes great with the oatmeal and the chocolate chips. I did add a little less than the recipe indicated, but it was enough. I only had smooth peanut butter, but chunky peanut butter, of even better, chopped peanuts would go great with these cookies. The cookies were crisp on the outside and slightly chewy on the inside. Just as I like them!
On more thing, the recipe said to chill the dough for two hours, which I didn't due to lack of time, but shaping the cookies went really well and they turned out very nicely shaped!
Recipe
Peanut Butter Oatmeal Chocolate Chip Cookies
Yield: about 60 cookies (recipe can be halved)
Ingredients:
3 cups old-fashioned oats
1 cup flour
1 teaspoon baking soda
2 teaspoons ground cinnamon
1/4 teaspoon grated nutmeg
1/4 teaspoon salt
2 sticks (8 ounces) butter, room temperature
3/4 - 1 cup peanut butter (depends on your taste)
1 cup sugar
1 cup (packed) light brown sugar
2 large eggs
1 teaspoon vanilla extract
9 ounces bittersweet chocolate, chopped into chunks or 1 1/2 cups chocolate chips
Instructions:
Preheat the oven to 180˚C (350˚F). Position the racks to divide the oven into thirds. Line two baking sheets with parchment paper.
Mix together the oats, flour, baking soda, cinnamon, nutmeg and salt.
Beat together the butter, peanut butter, sugar and brown sugar on medium speed until smooth and creamy.
Add one egg at a time, beating for one minute after each addition.
Beat in the vanilla.
Reduce the speed to low and slowly add the dry ingredients, beating only until blended.
Mix in the chocolate.
Cover and chill the dough for about 2 hours, or for up to one day (optional, for more evenly shaped cookies).
Drop rounded tablespoons 2 inches apart onto the baking sheet, or, if the dough is chilled, scoop rounded tablespoons and roll the balls between the palms of your hands and place them 2 inches apart on the sheets. Press the chilled balls gently with the heel of your hand until they are about 1/2 inch thick.
Bake for 13-15 minutes, rotating the sheets from top to bottom and front to back after 7 minutes.
The cookies should be golden and just firm around the edges. Lift the cookies onto cooling racks with a wide metal spatula.
Source: slightly adapted from Baking, From my home to yours by Dorie Greenspan
Monday, June 27, 2011
Cinnamon Squares
For my birthday I got two cookbooks: Baking, from my homepage to yours, by Dorie Greenspan and The perfect scoop by David Lebovitz. Although these books are already well known in a lot of countries. Over here they aren't, so I'm very happy with these books. You should probably prepare yourself for a lot of recipes by Dorie and David.
While reading Dorie's book my eye was caught by a lot of yummy looking things, among which these Cinnamon Squares. As we've had a lot of rain these past few days I was in the mood for a heartwarming pick-me-up. These squares called out to me. Cinnamon is one of my favorite spices and one I especially love on cold days.
The recipe was easy to follow and the end result was everything I hoped it would be. Fragrant, flavourful and heartwarming. And although the filling sunk to the bottom (again, I know) it still tasted great. And for a change I know why the filling sunk. I used normal chocolate chips instead of mini ones....
I will definetely make this more often! It's recipes like this one that have me yearning for fall!
Recipe
Cinnamon Squares
Yield: 9 large, 12 medium or 16 small squares
Ingredients:
For the cake:
1 1/4 cups plus 2 tablespoons sugar
1 tablespoon plus 2 1/2 teaspoons ground cinnamon
1 1/2 teaspoons instant espresso powder
1 3/4 cups flour
2 teaspoons baking powder
Pinch of salt
3/4 cup whole milk
2 large eggs
1/2 teaspoon vanilla extract
10 tablespoons butter, melted and cooled
3 ounces bittersweet chocolate, finely chopped or 1/2 cup mini chocolate chips
For the frosting:
6 ounces bittersweet chocolate, finely chopped
2 1/2 tablespoons butter, cut into 4 pieces
Instructions:
Center a rack in the oven and preheat the oven to 180 degrees C. (350 degrees F.).
Butter an 8-inch square baking pan or something close to it. Line the bottom with parchment paper.
In a small bowl stir together 2 tablespoons of sugar, 2 1/2 teaspoons of cinnamon and the espresso.
In a large bowl whisk together the flour, the remaining sugar, the baking powder, salt and the remaining cinnamon.
In another bowl whisk together the milk, eggs and vanilla.
Pour the liquid ingredients over the flour mixture and whisk gently until you have a homogenous batter.
With a whisk or a rubber spatula fold in the butter with a light touch, just until the butter is absorbed. You'll have a smooth, satiny batter.
Scrape half the batter into the pan and smooth the top.
Sprinkle the chocolate over the batter and dust with the cinnamon-sugar mixture.
Cover with the rest of the batter and smooth the top again.
Bake for 35-40 minutes until the cake is puffed and beginning to pull away from the sides of the pan. A toothpick inserted in the middle should come out clean.
Transfer the cake to a cooling rack and let it rest for 15 minutes before unmolding it onto another rack. Peel off the paper, invert it onto the first rack and let cool to room temperature, right side up.
To make the frosting:
Put the chocolate and butter in a heatproof bowl over a saucepan of simmering water.
Cook, stirring gently and often, just until they melt. Be careful not to overheat the mixture so much that it thins out; the chocolate should be smooth, very shiny, thick and spreadable.
Using an offset metal icing spatula or a table knife, spread the frosting in generous sweeps and swirls over the top of the cake. Allow the frosting to set at room temperature, then cut into squares.
Friday, June 17, 2011
White Chocolate and Raspberry Cupcakes
After my birthday party I found myself with a couple of left-over ingredients from the Chocolate Raspberry Cake and really wanted to use them. I concentrated on the fresh raspberries and the raspberry frosting and remembered a recipe by Ainsley Harriot. This particular recipe was about a muffin with white chocolate and raspberries, but as I am incapable of producing a normal muffin, I decided to adjust this idea into a cupcake.
And I have to say that I'm quite pleased with the end result. Big chunks of white chocolate and the juiciness of the raspberries make this a great cupcake, but the adding of the raspberry frosting elevates this into a great cupcake. Even my husband, who usually doesn't really like sweet and sugary cupcakes, loved this one!
Needless to say the cupcakes were gone all too soon....
Recipe
White Chocolate and Raspberry Cupcakes
Yield: 12
Ingredients:
Cupcakes:
125 gram (1 stick and 1 tablespoon) butter, room temperature
125 gram (2/3 cup) granulated sugar
2 large eggs
125 gram (1 cup and 2 tablespoons) self-raising flour
1/2 teaspoon vanilla-extract
2 tablespoons milk
125 gram (about 4 oz.) fresh raspberries
100 gram (3.5 oz.) chopped white chocolate, not too finely chopped
Raspberry frosting (this renders a lot of frosting, for a huge cake, so adjust to how much you need):
1 cup sugar
4 large egg whites
21 tablespoons butter, at room temperature
1/3 cup strained raspberry purée
1/2 teaspoon vanilla extract
Instructions:
Cupcakes:
Preheat the oven to 200˚C (400˚F).
Cream together the butter and sugar until light and fluffy.
Add the vanilla.
Add one egg at a time, followed by a tablespoon of flour, beating until the egg is completely incorporated before adding the next.
Stir in the rest of the flour.
When everything is mixed well, you can add the milk, as much as you think you need, I usually add 2 tablespoons, but you can use more or less.
Add the chocolate and the raspberries and very gently fold them into the batter.
Fill your muffin tray or just paper liners about 2/3 full and bake for 15-20 minutes, until a toothpick inserted comes out clean.
Let the cupcakes cool on a wire rack to cool completely before frosting with the raspberry frosting.
Raspberry frosting:
Combine the sugar and egg whites in a heatproof bowl set over a pot of simmering water.
Heat, whisking frequently, until the mixture reaches about 70°C (160°F) and the sugar has dissolved.
Transfer the mixture to the bowl of a stand mixer fitted with the whisk attachment.
Beat on medium-high speed until stiff peaks form and the mixture has cooled to room temperature, about 8 minutes (the bowl should be cool to the touch).
Reduce the speed to medium and add the butter, 2 tablespoons at a time, adding more once each addition has been incorporated and just keep going. If the frosting looks soupy or curdled, continue to beat on medium-high speed until thick and smooth again, about 3-5 minutes more (or longer).
Blend in the raspberry puree and vanilla until smooth and completely incorporated.
Wednesday, June 8, 2011
Chocolate Raspberry Cake
As I mentioned I fell in love with a Chocolate Raspberry Cake by Annie's Eats which I decided to make for my birthday. I had never actually made a real grown-up layer cake before, but decided to just go for it.
I started a week ahead with a trial bake for the chocolate cake which was in the recipe. Unfortunately it was a big disappointment. It was extremely heavy and much too moist for me. I wanted a nice fluffy and light chocolate cake. So I decided to make a sponge cake with some cocoa added for the chocolate flavour. And boy, was I glad I did! The frostings and fillings make this a quite heavy cake, but the light sponge cake makes it so much more balanced out! It is a great combination of textures and flavours.
This is not a cake you can just whip up. I planned an entire day for making this cake. This gave me plenty of time and kept the stress to a bare minimum. I had plenty of breaks so when the cake was finished I was not completely exhausted.
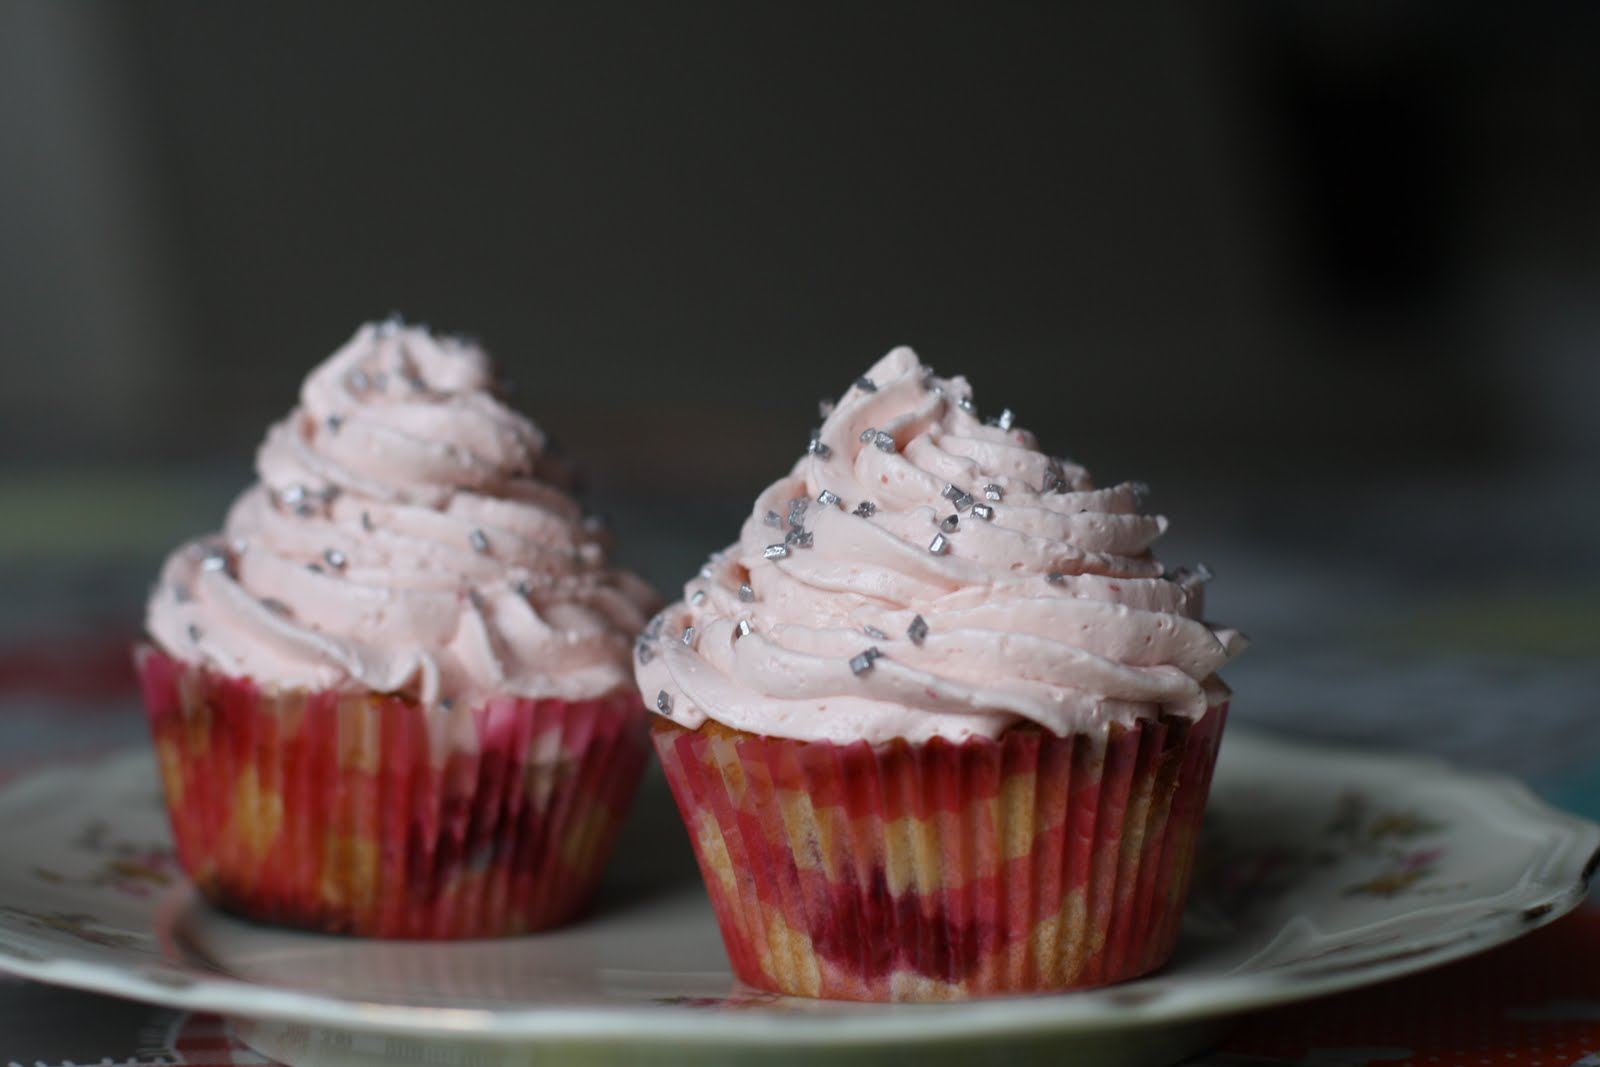
I wasn't sure about adding the chocolate glaze on top of the cake, but you should definitely add it. It completely transforms the cake. The recipe makes to much of the raspberry filling and the raspberry frosting, but you can easily use the left-overs for some wonderful other things. I also made a simple ganache for the top layer instead of chocolate glaze, but this was more because I didn't have any light corn syrup and that is something I can't easily come by.
Oh, one more thing... it was quite warm the day I made this, which made handling this cake quite tricky. I had to put the cake in the fridge a couple of times to make sure everything stayed were it was supposed to stay. And you should keep the cake in the fridge until serving time!
The end result is breathtaking. So if you have a special occasion coming up, make this cake! You won't regret it!
Recipe
Chocolate Raspberry Cake
Ingredients:
Chocolate cake:
1 7/8 cups flour
30 gram (1/4 cup) cocoa powder
9 eggs
1 1/8 cups caster sugar
90 gram (3 oz) butter, melted
Raspberry filling:
16 oz. frozen raspberries, thawed in a sieve over a bowl
1/3 cup sugar
3 tablespoons cornstarch
1 teaspoon lemon juice
Ganache filling:
8 oz. bittersweet chocolate, finely chopped
1 cup heavy cream
3 tablespoons butter, at room temperature
Raspberry frosting:
1 cup sugar
4 large egg whites
21 tablespoons butter, at room temperature
1/3 cup strained raspberry puree
1/2 teaspoon vanilla extract
For the chocolate glaze:
4 oz. bittersweet chocolate, finely chopped
1/2 cup heavy whipping cream
2 tablespoons butter, at room temperature
2 teaspoons vanilla extract
Instructions:
Start by making the cakes. Preheat the oven to 180˚C (350˚F).
Sift the flour and cocoa powder three times and set aside.
Place the eggs and sugar in a big bowl of an electric mixer and beat for 8-10 minutes, until thick, pale and tripled in volume.
Sift the flour and cocoa powder over the egg-mixture and gently fold through.
Fold through the melted butter.
Grease three 22 cm (9 inch) round cake tins and line the bases with parchment paper.
Divide the batter over the three cake tins and bake for 25 minutes until the cakes are springy to the touch and come away from the sides of the tin.
Let the cakes cool completely on wire racks.
For the raspberry filling, drain the thawed berries, reserving the juice in a liquid measuring cup.
Add water to the juice so that the total liquid equals 1 1/4 cups.
Add the liquid to a medium saucepan with the sugar and cornstarch.
Heat over medium-high heat, whisking occasionally, until the mixture begins to bubble and thicken. Keep whisking to make sure there will be no lumps.
Once thickened, remove from the heat and whisk in the lemon juice.
Fold in the drained berries with a spatula.
Cover and chill until ready to use (the filling will continue to thicken as it chills).
For the ganache filling, place the chopped chocolate in a heatproof bowl.
Heat the cream in a saucepan and bring to a simmer.
Immediately remove from the heat and pour the hot cream over the chopped chocolate.
Let stand 1-2 minutes, then whisk together until a smooth, thick ganache is formed.
Whisk in the butter 1 tablespoon at a time until completely incorporated.
Let the ganache sit to thicken a bit so that it is suitable for spreading and piping (this can take quite a while, to speed thickening, place the bowl in the fridge or freezer and whisk every 10 minutes to ensure even cooling until the desired consistency is reached).
Transfer about 1/2 cup of the thickened ganache to a pastry bag fitted with a plain round tip about 1/2-inch in diameter. Reserve another ½ cup of ganache in a small bowl or container (this can be used later for decorative detailing, if you want to).
Now it's time to start assembling the cake! Place one of the cooled cake layers on a cake board or serving platter.
Spread 1/2 cup of the ganache in an even layer over the cake. Using the reserved ganache in the pastry bag, pipe a border around the perimeter of the cake layer. This border will keep the raspberry filling in place, so make sure it is completely closed. If the ganache is a bit soft when you pipe it on the cake, put the cake with the ganache border in the fridge, so it becomes more solid.
Spoon some of the raspberry filling inside the ganache border in an even layer.
Top with another layer of cake and repeat this process, layering with another 1/2 cup of ganache and additional raspberry filling.
Top with the remaining cake layer.
The cake is really coming together now! The next step is the raspberry frosting. Combine the sugar and egg whites in a heatproof bowl set over a pot of simmering water.
Heat, whisking frequently, until the mixture reaches about 70°C (160°F) and the sugar has dissolved.
Transfer the mixture to the bowl of a stand mixer fitted with the whisk attachment.
Beat on medium-high speed until stiff peaks form and the mixture has cooled to room temperature, about 8 minutes (the bowl should be cool to the touch).
Reduce the speed to medium and add the butter, 2 tablespoons at a time, adding more once each addition has been incorporated and just keep going. If the frosting looks soupy or curdled, continue to beat on medium-high speed until thick and smooth again, about 3-5 minutes more (or longer).
Blend in the raspberry puree and vanilla until smooth and completely incorporated.
Frost the top and sides of the assembled cake with the raspberry frosting, smoothing the surface as much as possible.
Chill for at least 30 minutes!
To make the chocolate glaze, place the chocolate in a medium bowl.
Heat the cream in a small saucepan over medium heat until simmering.
Pour the hot cream over the chocolate and let sit 1-2 minutes.
Whisk until the mixture is smooth and homogenous.
Blend in the vanilla.
Pour the glaze into a pitcher or measuring cup and let cool for 10 minutes (do not let the glaze cool too long or too short or it may become difficult to pour over the cake).
Slowly pour the glaze over the cake, ensuring that the top is covered and the glaze slowly drips over the sides.
Let the glaze set about 5-10 minutes.
Transfer the reserved ganache to a pastry bag fitted with a decorative tip. Pipe swirls of ganache around the edge of the top of the cake and top each swirl with a fresh raspberry.
Chill the cake until ready to serve.
Tuesday, May 17, 2011
Self-frosting Nutella cupcakes
It's basically a vanilla cupcake with a swirl of Nutella on top. I have to admit that I had a lot of trouble with swirling in the Nutella. The Nutella was much thicker than the batter. It was a bit too cold. So instead of self-frosting it became self-filling... Some of the Nutella stayed on top, but most of it just sunk into the batter and stayed there... hence: self-filling. But I guess that's what made this cupcake so popular with my girls. You start eating a cupcake and then suddenly there is a lovely filling of Nutella, what kid can resist that?
The next time I'm making sure the Nutella is softer so I can actually swirl the Nutella in!
I found this recipe over on Baking Bites, it is an adaptation of a recipe from Donna Hay.
Oh, in the comments over on Baking Bites, some people found the cupcakes to dry. There was some discussion over the amount of flour. In order to make sure I had the right amount I sifted the flour above a scale until I had the right amount. Works great! If you want to use cups, there is a big difference between 1 3/4 cup flour before it is sifted and 1 3/4 cup of sifted flour, so it works better to sift and then measure.
Recipe
Self-frosting Nutella Cupcakes
Yield: 12 cupcakes
Ingredients:
140 gram (10 tablespoons) butter, softened
3/4 cup sugar
3 eggs
1/2 teaspoon vanilla extract
200 gram (1 3/4 cup) sifted flour
1/4 teaspoon salt
2 teaspoons baking powder
About 1/3 cup Nutella
Instructions:
Preheat the oven to 170ºC (325ºF).
Fill a tray for 12 muffins with paper liners.
Beat together the butter and sugar until light and fluffy (about 2 minutes).
Add the eggs one at a time, beating until fully incorporated.
Add the vanilla and stir.
Add the flour, salt and baking powder and stir until well combined.
Fill the muffin tins 3/4 full. Spoon 1 1/2 teaspoon on top of each muffin. With a toothpick swirl in the Nutella, making sure to fold a bit of batter up over the Nutella.
Bake for 15-20 minutes.
Remove to a wire rack to cool completely. But if you can't wait that long....remember that the Nutella will be very hot! So try to keep it away from your kids.
Sunday, May 15, 2011
Perfect Chocolate Ice Cream
The only thing I hate about custard-base ice creams is that you have to let the base cool down before you can actually pour it into the ice cream maker. Not something I'm very good at.... To help speed this process I put the warm pan in a sink filled with ice cold water. But it is of course best to make it ahead.
I found the recipe at Joy of Baking and was so pleased with the end result that I made no changes whatsoever.
Recipe
Chocolate Ice Cream
Ingredients:
2 cups half-and-half (or 1 cup whole milk and 1 cup single cream)
50 gram (1/3 cup plus 2 tablespoons) dutch-processed cocoa powder
1/2 vanilla bean
55 gram (2 ounces) semisweet chocolate, chopped
4 large egg yolks
100 gram (1/2 cup) granulated sugar
Instructions:
In a saucepan whisk together the half-and-half and the cocoa powder until well blended.
Place the saucepan over medium-high heat and bring the mixture with the vanilla bean to a scalding point where the milk begins to foam up.
Remove the saucepan from the heat, take out the vanilla bean. Cut the vanilla bean in two, lengthwise, and scrape the seeds from the bean with the back of a knife. Mix the seeds back into the mixture.
Add the chopped chocolate and stir until the chocolate has completely melted.
In a stainless steel bowl beat the egg yolks and sugar until light and fluffy (about two minutes).
Very slowly pour the scalding half-and-half mixture into the egg yolk mixture, mixing constantly so the eggs don't curdle.
Place the bowl over a pan with simmering water. Stir constantly with a wooden spoon and cook until the mixture thickens and coats the back of a spoon (170ºF or 77ºC).
Immediately remove the mixture from the heat and keep stirring a few minutes so it doesn't overcook.
Cover the mixture with plastic wrap and let cool to room temperature and then refrigerate the mixture for several hours or overnight until completely cold. You can speed the process along by placing the mixture in a sink with ice cold water. And if you're really impatient you can skip the refrigerator, but your ice will be very soft.
Transfer the cold mixture to your ice cream maker and follow the manufacturer's instructions. After it is finished you can store the ice cream in the freezer.
Thursday, May 5, 2011
Miniature Gooey Chocolate Stacks
The recipe is really quite easy and everything worked great. I decided to use half the recipe, because there were only five of us and the original recipe is for 10-12 people. I also used cornstarch instead of flour in the creme patissiere, because my sister is allergic to gluten. On the sheet of parchment paper I drew 15 circles for which I used a glass. Luckily for me this turned out to be perfect! I kept the original baking time, because I didn't have enough time to let it cool down in the oven, as our dinner still had to be prepared in the oven....
This is a great dessert and one you can easily prepare ahead of time. Just don't assemble the cake ahead of time, I think it will become soggy.When it's time for dessert all you have to do is spread the creme patissiere onto the meringue discs, sprinkle over some nuts et voila! It is impressive to see and fantastic to eat. Though if there are children involved it might get messy!
I completely forgot to take pictures, but then again.... I probably would not have survived the lynch that would have followed had I kept this dessert from my eaters that long...
Recipe
Miniature Gooey Chocolate Stacks
Yield: 5 miniature Gooey Chocolate Stacks
Ingredients:
For the meringue discs:
3 large egg whites
50 gram sugar
1 tablespoon cocoa powder
1/2 teaspoon red wine vinegar (I didn't have this, so I used ordinary, which worked great)
For the creme patissiere:
3 large egg yolks
50 gram sugar
1 tablespoon cocoa powder
1 tablespoon flour (or 1 1/2 scant teaspoons cornstarch)
100 millilitre whole milk
200 millilitre cream
50 gram good quality dark chocolate, melted
1/2 teaspoon vanilla
2 tablespoons pistachios, chopped
Instructions:
Preheat the oven to 140ºC (275ºF).
Line a big baking sheet or several baking sheets with parchment paper. Draw 15 small circles on the paper using a glass, or drinking cup.
Beat the egg whites until stiff, then add the sugar a tablespoon at a time, beating well after each tablespoon. Sprinkle over the cocoa and vinegar and fold in gently but firmly (meaning don't stir).
Divide the egg whites mixture over the circles, spread evenly. If you're up for it you can even use a piping bag.
Bake for 1 hour, turn the oven off and leave the meringues in the oven until cool. Or you can just take them out after the hour.
Beat for the creme patissiere the egg yolks and sugar together, add the cocoa and flour (or cornstarch), stirring well.
In a saucepan warm the milk and cream, then, while whisking continually, slowly pour the milk mixture onto the egg mixture.
Pour everything back into the saucepan, turn the heat back on, and stirring constantly, bring it to a boil.
When the mixture has thickened, take it off the heat and stir in the melted chocolate and vanilla.
Let it cool, but not in the refrigerator. Put plastic foil on the top so it doesn't form a skin. It will cool quicker if you put the saucepan in a sink filled with ice cold water.
To assemble one miniature cake, place one meringue disc on a plate. Spread one third of the chocolate cream on top. Put another disc on top of this. Spread one third of the chocolate cream on top. Repeat one more time.
Sprinkle the chopped pistachios on top.
Enjoy!
Thursday, April 28, 2011
World Peace Cookies
The name alone made me decide on the spot that I had to try this recipe. I then actually read the recipe and decided that not only did I have to make this recipe, I had to make it IMMEDIATELY! It's a simple recipe with a lot of chocolate and you know I can't resist chocolate!
I urge you to try these cookies. Keep in mind that the dough has to rest in the refrigerator for 3 hours so making the dough ahead of time can be handy! I know 3 hours is a long time, I know that you want to eat these cookies straight away, but you really have to wait. I know you can do it.
Recipe
World Peace Cookies
Yield: 36 cookies
Ingredients:
1 1/4 cups all-purpose flour
1/3 cup unsweetened cocoa powder
1/2 teaspoon baking soda
1 stick plus 3 tablespoons (11 tablespoons) unsalted butter, at room temperature
2/3 cup (packed) light brown sugar
1/4 cup sugar
1/2 teaspoon fleur de sel or 1/4 teaspoon fine sea salt
1 teaspoon vanilla extract
5 ounces bittersweet chocolate chips
Instructions:
Sift the flour, cocoa and baking soda together.
Working with a stand mixer, preferably fitted with a paddle attachment, or with a hand mixer in a large bowl, beat the butter on medium speed until soft and creamy. Add both sugars, the salt and vanilla extract and beat for 2 minutes more.
Add the flour, drape a kitchen towel over the stand mixer to protect yourself and your kitchen from flying flour and pulse the mixer at low speed about 5 times, a second or two each time. Take a peek — if there is still a lot of flour on the surface of the dough, pulse a couple of times more; if not, remove the towel.
Continuing at low speed, mix for about 30 seconds more, just until the flour disappears into the dough — for the best texture, work the dough as little as possible once the flour is added, and don’t be concerned if the dough looks a little crumbly.
Toss in the chocolate pieces and mix only to incorporate.
Turn the dough out onto a work surface, gather it together and divide it in half.
Working with one half at a time, shape the dough into logs that are 1 1/2 inches in diameter. Wrap the logs in plastic wrap and refrigerate them for at least 3 hours. (The dough can be refrigerated for up to 3 days or frozen for up to 2 months. If you’ve frozen the dough, you needn’t defrost it before baking — just slice the logs into cookies and bake the cookies 1 minute longer.)
Center a rack in the oven and preheat the oven to 325 degrees F. Line two baking sheets with parchment or silicone mats.
Working with a sharp thin knife, slice the logs into rounds that are 1/2 inch thick. (The rounds are likely to crack as you’re cutting them — don’t be concerned, just squeeze the bits back onto each cookie.) Arrange the rounds on the baking sheets, leaving about 1 inch between them.
Bake the cookies one sheet at a time for 12 minutes — they won’t look done, nor will they be firm, but that’s just the way they should be. Transfer the baking sheet to a cooling rack and let the cookies rest until they are only just warm, at which point you can serve them or let them reach room temperature.
The cookies can be eaten when they are warm or at room temperature — I prefer them at room temperature, when the textural difference between the crumbly cookie and the chocolate bits is greatest — and are best suited to cold milk or hot coffee.
Packed airtight, cookies will keep at room temperature for up to 3 days; they can be frozen for up to 2 months.