A 30-something old girl trying to figure out what to do with her life.... HELP!!!!
Showing posts with label Fruit. Show all posts
Wednesday, May 30, 2012
Strawberry Frozen Yoghurt
If the weather is warm there is nothing I crave more than ice cream. Unfortunately most ice creams involve a lot of work and if you're working with a custard based ice cream it's even better to start making it a day in advance. Not really what you're looking for when it's hot outside... enter this Strawberry Frozen Yoghurt. This is about as lazy as you can get. You slice some strawberries and let them soak with some sugar. Put all the ingredients in a blender, refrigerate and pour it into your ice cream maker. But even that was too much work for me.
A while ago I bought a massive amount of strawberries and put lots of them in the freezer, thinking that there are a lot of ways I can use those strawberries... and boy, was I right, because these frozen strawberries are perfect for making this ice cream. I just tossed the strawberries right into the blender along with the other ingredients. Flipped on the blender and just let the blender work its magic. Because of the frozen strawberries, the mixture becomes very thick, it's already almost frozen. After this I just poured it into the ice cream maker (no refrigeration necessary!) and let it churn for about 20 minutes. So with this combination you can have strawberry frozen yoghurt in 30 minutes! Wooohoooo! I foresee a summer filled with this ice cream!
Recipe
Strawberry Frozen Yoghurt
Yield: about 1 quart
Ingredients:
1 pound strawberries (fresh or frozen)
2/3 cup sugar
2 teaspoons vodka or kirsch (optional)
1 cup plain yoghurt (whole milk, but non-fat works also)
1 teaspoon lemon juice
Instructions:
If you're using fresh strawberries, slice them and toss it in a bowl with the sugar and vodka (or kirsch). Stir until the sugar begins to dissolve. Set aside and let stand for about 1 hour. If you're using frozen strawberries, just skip this step.
Put the yoghurt, strawberries and lemon juice into the blender and purée until smooth.
If you've used fresh strawberries refrigerate the mixture for 1 hour.
Freeze the mixture in your ice cream maker according to the manufacturer's instructions.
Source: The Perfect Scoop by David Lebovitz
Monday, May 28, 2012
Chocolate Chip Pancakes with Vanilla Strawberries
On weekdays we never have the time to make much of breakfast. Erik leaves really early (and I mean reaaaaly early) and I'm not much of a morning person. I try to keep it as simple as possible so my head can process what is going on and make sure everything gets done on time.
But in the weekends I do love to make a bit more work of breakfast. This isn't always possible, but I'm always so happy when I can give my family something special, and more importantly, something delicious.
These pancakes are, despite the long title, easy to whip up. They are fluffy and flavourful, filled with chocolate chips (because, let's face it... what doesn't taste better with a bit of chocolate in it?) and the strawberries are divine and go great with these pancakes. And although it isn't shown in the pictures....we topped these pancakes off with a bit of whipped cream, making it a bit over the top. It feels like you're eating a dessert for breakfast and well...who doesn't like that!
Recipe
Chocolate Chip Buttermilk Pancakes with Vanilla Strawberries
Yield: a lot of pancakes, we even had some leftovers...
Ingredients:
For the pancakes:
2 eggs
2 cups flour
2 tablespoons sugar
2 teaspoons baking powder
1 teaspoon baking soda
1/2 teaspoon salt
2 cups buttermilk (or 1/2 cup milk and 1 1/2 cup plain yogurt)
4 tablespoons butter, melted and cooled
1/2 teaspoon vanilla extract
3/4 cup chocolate chips
For the strawberries:
1 pint strawberries
2-4 teaspoons vanilla sugar (or 1/4 vanilla bean and 2-4 teaspoons sugar)
Instructions:
Start by cutting the strawberries into slices. Put the sliced strawberries in a bowl and add the vanilla sugar (I always keep a jar handy, just fill a jar with regular sugar and stuff in some vanilla beans which have been scraped empty of the seeds. Every time I have a leftover empty vanilla bean I replace the ones in the jar with these) or scrape the seeds out of 1/4 vanilla bean and add regular sugar. Mash everything together a bit (not too much!) and put the strawberries aside, so they can release their juices and the sugar can dissolve.
Beat the eggs in a large bowl. Add the buttermilk (or milk and yogurt), melted butter and vanilla and mix well.
Add the flour, sugar, baking powder, baking soda and salt and mix together until almost smooth.
Fold in the chocolate chips and let the batter rest for several minutes.
Over medium heat, heat a pan or griddle. Add a little butter or oil.
Pour the batter onto the pan and cook until bubbles start to form that pop. Flip the pancake with a spatula and cook until the other side is golden brown. Repeat with the rest of the batter. The amount of batter that you use depends a bit on how big you want your pancakes to be. I like my pancakes to be a bit bigger, so I use a small ladle, but you can make yours smaller and add about 2 tablespoons of batter to the pan.
To serve the pancakes, top them with the strawberries and a dollop of whipped cream!
Source: slightly adapted from Joy the Baker
Thursday, April 19, 2012
Double Chocolate Raspberry Cupcakes
Like many women, I too have a serious chocolate addiction. I prefer to eat chocolate everyday. I know this is not the smartest thing to do, so I try to restrain myself as much as possible. But there are times when I, like the best of us, cave. Especially when I run into a recipe like Double Chocolate Raspberry Cupcakes. It goes without saying that I'm already hooked when reading a title that contains Double Chocolate, but I have to admit that I love the combination of chocolate and raspberry.
So I caved and made these cupcakes. And you know what? I am so glad I did, because these cupcakes are a little piece of heaven! No, I am not exaggerating... they are fluffy, moist, almost light as air, with an amazing chocolate flavour. Inside you find that fresh, slightly tangy flavour of the raspberries and the whole thing is covered with ganache! Like I said... a little piece of heaven....
I know these cupcakes lack the outer display of raspberries, but the reason for this is simply that I didn't have any fresh raspberries on hand. I used frozen for the filling, but they don't look nice enough for the decoration on top, so I decided to just skip that. It's maybe even more fun this way, because people expect to eat a chocolate cupcake and are surprised when they taste the raspberry filling. Makes it a little bit more fun!
If you love chocolate, or have a serious chocolate addiction, go make these! You have my blessing!
Recipe
Double Chocolate Raspberry Cupcakes
Yield: 24-28 cupcakes
Ingredients:
For the cupcakes:
3 oz. semisweet chocolate, finely chopped
1 1/2 cups hot brewed coffee
3 cups sugar
2 1/2 cups all-purpose flour
1 1/2 cups Dutch processed cocoa powder
2 teaspoons baking soda
3/4 teaspoon baking powder
1 1/4 teaspoon salt
3 large eggs
3/4 cup vegetable oil
1 1/2 cups buttermilk or yogurt
3/4 teaspoon vanilla extract
For the filling:
12 oz. frozen raspberries, thawed
1/4 cup sugar
1 tablespoon cornstarch
For the frosting:
12 oz. bittersweet or semisweet chocolate, finely chopped
3/4 cup heavy cream
1 1/2 tablespoons sugar
1 1/2 tablespoons corn syrup
3 tablespoons unsalted butter, at room temperature
Instructions:
Preheat the oven to 180˚C (350˚F). Line cupcake pans with paper liners.
Put the chopped chocolate in a medium bowl and add the hot coffee. Let stand for 2 minutes and whisk until the chocolate is melted and incorporated in the coffee.
In a separate large bowl mix together the sugar, flour, cocoa, baking soda, baking powder and salt.
Beat the eggs on medium-high speed in the bowl of an electric mixer until slightly thickened and pale yellow. Gradually add the oil, buttermilk or yogurt, vanilla extract and coffee-chocolate mixture to the eggs, making sure it is well blended.
Add the dry ingredients and mix until just incorporated.
Divide the batter between the paper liners, filling them about 3/4 full.
Bake for 18-20 minutes, until a toothpick inserted in the middle comes out clean. Let the cupcakes cool for 5-10 minutes in the pans, before transferring them to a rack to cool completely.
To make the raspberry filling, puree the raspberries in a blender. If you want to remove the seeds (which I recommend) strain the mixture through a fine sieve. Put the puree in a small saucepan and whisk in the sugar and cornstarch. Bring the mixture to a boil, stirring frequently. Once the mixture has thickened, remove the pan from the heat. Let the mixture cool before use.
To make the ganache, add the chopped chocolate to a medium heatproof bowl. Combine the cream, corn syrup and sugar in a saucepan and heat until it starts boiling. Immediately pour the mixture over the chopped chocolate and let stand for 2 minutes. Whisk the mixture carefully until it is smooth and well blended. Add the butter 1 tablespoon at a time, whisking until completely incorporated. Let the ganache cool to room temperature to thicken so it can be spread. If you want to speed up this process put the bowl in the refrigerator, stirring every 5-10 minutes, until it has reached the desired thickness.
Once you have made all the elements it is time for the assembly! Put the raspberry filling in a pastry bag, fitted with a plain fine tip or a special tip for filling, if you have one). Just stick the tip of the pastry bag in the top of a cupcake and pipe in some filling. If you're not sure how much to use, go easy and if you have filling left at the end, just make another round. You don't need more than a few teaspoons of filling for each cupcake.
Spread the ganache over the tops of the cupcakes with a knife or an offset spatula. Allow the ganache to set completely before serving.
Source: barely adapted from Annie's Eats
Thursday, March 29, 2012
Grapefruit Olive Oil Cake
I realize I have been absent for a looooong time, but that doesn't mean I didn't bake or thought of writing up posts. It just means I have been crazy busy...and I've also been a bit conflicted about blogging. Don't get me wrong I love blogging, but these past few months I have been tired, busy and well....not feeling up to much. So much was happening that it felt like riding a rollercoaster...non-stop...
But I kept asking myself the question: to blog or not to blog? Well, I guess the answer is to blog.
So without much further ado I'm going to give you a recipe for a Grapefruit Olive Oil Cake. As far as cakes go this is one you can eat without feeling extremely guilty. Sure it contains sugar and calories and a few other things that probably aren't too healthy, but....BUT it also contains fresh grapefruit, olive oil and whole wheat flour! In my opinion...that makes this cake very healty!!! The end result was very surprising. It was moist, fluffy and very flavorfull! Definitely one to make again!
Recipe
Grapefruit Olive Oil Cake
Ingredients:
For the cake:
2 grapefruits (organic if possible)
1 cup sugar
Scant 1/2 cup buttermilk or yoghurt
3 eggs
2/3 cup extra virgin olive oil
1 cup whole wheat flour
3/4 cup all-purpose flour
1 1/2 teaspoons baking powder
1/4 teaspoon baking soda
1/4 teaspoon salt
For the glaze:
1/2 cup brown sugar
1/2 cup confectioner's sugar
4 teaspoons grapefruit juice (from the grapefruits for the cake)
Instructions:
Preheat the oven to 180˚C (350˚F) and butter and flour a 9 x 5 inch loaf pan or a Bundt pan.
Zest the 2 grapefruits directly in a large mixing bowl. Add the sugar and rub the zest and sugar together with your fingers. This makes sure all the oils from the grapefruit zest get combined with the sugar.
Squeeze one halve of a grapefruit and pour the liquid in a measuring cup. Fill the measuring cup with the buttermilk or yogurt until you have 2/3 cup of liquid.
Add the grapefruit juice mixture to the sugar mixture and whisk well. Mix in the eggs and the olive oil.
In another bowl whisk together the flours, baking powder, baking soda and salt. Add the dry ingredients slowly to the wet mixture and mix well to combine.
Pour the batter into the buttered pan.
Bake for about 50 minutes until golden brown. A toothpick inserted in the middle should come out clean. Mine was done at 48 minutes, depending on the size of your pan etc. You could start testing at around 45 minutes.
Let the cake cool for 10 minutes then unmold and let cool on a rack. Let cool to room temperature before adding the glaze.
For the glaze: squeeze the juice from the remaining grapefruit. Mix the sugars with 4 teaspoons of the juice. Stir well. Spread the glaze over the top of the cake and let harden slightly before cutting.
Source: The Yellow House
But I kept asking myself the question: to blog or not to blog? Well, I guess the answer is to blog.
So without much further ado I'm going to give you a recipe for a Grapefruit Olive Oil Cake. As far as cakes go this is one you can eat without feeling extremely guilty. Sure it contains sugar and calories and a few other things that probably aren't too healthy, but....BUT it also contains fresh grapefruit, olive oil and whole wheat flour! In my opinion...that makes this cake very healty!!! The end result was very surprising. It was moist, fluffy and very flavorfull! Definitely one to make again!
Recipe
Grapefruit Olive Oil Cake
Ingredients:
For the cake:
2 grapefruits (organic if possible)
1 cup sugar
Scant 1/2 cup buttermilk or yoghurt
3 eggs
2/3 cup extra virgin olive oil
1 cup whole wheat flour
3/4 cup all-purpose flour
1 1/2 teaspoons baking powder
1/4 teaspoon baking soda
1/4 teaspoon salt
For the glaze:
1/2 cup brown sugar
1/2 cup confectioner's sugar
4 teaspoons grapefruit juice (from the grapefruits for the cake)
Instructions:
Preheat the oven to 180˚C (350˚F) and butter and flour a 9 x 5 inch loaf pan or a Bundt pan.
Zest the 2 grapefruits directly in a large mixing bowl. Add the sugar and rub the zest and sugar together with your fingers. This makes sure all the oils from the grapefruit zest get combined with the sugar.
Squeeze one halve of a grapefruit and pour the liquid in a measuring cup. Fill the measuring cup with the buttermilk or yogurt until you have 2/3 cup of liquid.
Add the grapefruit juice mixture to the sugar mixture and whisk well. Mix in the eggs and the olive oil.
In another bowl whisk together the flours, baking powder, baking soda and salt. Add the dry ingredients slowly to the wet mixture and mix well to combine.
Pour the batter into the buttered pan.
Bake for about 50 minutes until golden brown. A toothpick inserted in the middle should come out clean. Mine was done at 48 minutes, depending on the size of your pan etc. You could start testing at around 45 minutes.
Let the cake cool for 10 minutes then unmold and let cool on a rack. Let cool to room temperature before adding the glaze.
For the glaze: squeeze the juice from the remaining grapefruit. Mix the sugars with 4 teaspoons of the juice. Stir well. Spread the glaze over the top of the cake and let harden slightly before cutting.
Source: The Yellow House
Labels:
Fruit,
Pies and Tarts and Cakes
Friday, September 30, 2011
Lemon Coconut Cupcakes
About two weeks ago Nikki, my oldest girl, decided she wanted to learn how to cook. She really didn't like it when I was sick, because there was no unlimited supply of baked goodies. I just love the way a child's mind sometimes works.... But despite that it made me very proud when she announced she wanted to learn to cook. It isn't always easy to cook with kids, but from time to time I give it a try.
I asked her what she wanted to make and as she looooves lemons she wanted to make lemon cupcakes. Okay, no problem there. That is simple enough. But then she said she wanted lemon coconut cupcakes. And now I was facing a problem. I had never made lemon coconut cupcakes. I didn't even know if it was a known combination. I really didn't want to disappoint her so we searched for a recipe. Obviously we found one, because otherwise I wouldn't be writing about it.
We had a lot of fun. I let her do all the work (except putting the cupcakes in the oven and taking them out again). And she did a fantastic job. Of course the project took about three times as long to finish but that didn't bother me one bit. She had fun and hopefully she will continue having fun in the kitchen. I hope she will come to love it as much as I do!
The batter for these cupcakes is a little strange because of the coconut milk, but the end result is great. You can taste both the coconut and the lemon, but they are both not overwhelming.
Recipe
Lemon Coconut Cupcakes
Yield: 12 cupcakes
Ingredients:
For the cupcakes:
1 1/3 cup flour
1 teaspoon baking soda
1/2 teaspoon baking powder
1/4 teaspoon salt
1 egg
1/2 cup sugar
zest of 1 lemon
1/4 cup butter
1 cup coconut milk
1/4 cup shredded coconut
For the frosting:
1 stick butter
2-3 tablespoons lemon juice
1 3/4 - 2 cups confectioners' sugar
Instructions:
Preheat the oven to 180˚C (350˚F). Line a muffin tray with paper cups.
In a medium bowl, sift together the flour, baking soda, baking powder and salt.
Add the coconut and set aside.
In a small bowl zest the lemon.
Add the sugar and rub with your fingers so the sugar and zest are well mixed. Set aside.
Beat the butter in a large bowl until creamy.
Add the sugar and beat for 2 minutes.
Add the egg and beat for 3 minutes.
In four additions add the coconut milk and flour mixture until everything is mixed well.
Divide the batter into the paper cups. Bake for 18-25 minutes until a toothpick comes out clean.
Let the cupcakes completely cool on a rack before frosting.
For the frosting cream the butter in a large bowl of a stand mixer.
Slowly add the confectioners' sugar (the amount depending on how sweet you want it).
Add the lemon juice to taste. Beat on high speed until fluffy and smooth.
Frost the cupcakes by simply spreading it on top or by piping it.
Top of with a little extra shredded coconut.
Source: adapted from Good Life Eats
Labels:
Cupcakes and small cakes,
Fruit
Wednesday, September 7, 2011
Plum Torte
The season for stone fruits is almost over, but luckily there are still plenty of plums. I stumbled on some fantastic plums. They were juice and sweet, with just a hint of tartness. Just the way I like them. After eating a bunch I still had a lot leftover and I wanted to put them to good use. And so I set out to find a good recipe for something nice.
I found a recipe of Amanda Hesser's Purple Plum Torte. It sounded very easy and delicious so I set to work. And it turned out amazing. Yes, the plums sunk to the bottom, but that was supposed to happen this time! It looks like a very dense cake, but it isn't. It is light, slightly sweet and the plums are fruity and soft with still that slight tartness in them. Lovely.
I took the cake over to my parents-in-law and it was almost gone when I left. It didn't last long. Apparently this cake freezes very well, but I have yet to try that out. It is, however, extremely simple to make, so that alone is reason enough to give this recipe a try!
Recipe
Plum Torte
Yield: 1 9-inch torte
Ingredients:
1 cup flour
1 teaspoon baking powder
A large pinch of salt
1 cup + 1 tablespoon sugar
1 stick of butter, room temperature
2 large eggs
10-12 plums, halved and pitted (enough to fit in the pan)
2 teaspoons lemon juice
1 teaspoon ground cinnamon
Instructions:
Preheat the oven to 180˚C (350˚F).
In a medium bowl sift together the flour, baking powder and salt.
In a mixer beat together the sugar and butter until creamy and light in color.
Beat in the dry ingredients and then the eggs.
Scrape the batter into an ungreased 9-inch springform pan.
Cover the top of the batter with the plums, skin side up.
Sprinkle the top of the batter and plums with the remaining tablespoon of sugar, the lemonjuice and the cinnamon.
Bake in the oven for 45-50 minutes, until the cake is golden.
Let the cake cool on a rack, then unmold.
Source: slightly adapted from The Essential New York Times Cookbook, Amanda Hesser
Labels:
Fruit,
Pies and Tarts and Cakes
Wednesday, August 31, 2011
Brown Sugar - Cinnamon Peach Pie
I'm still trying to make the most of the last of this summer's produce. And with a mission in my mind I set out to make something nice with what will probably be my last fresh peaches for this year. I had already made peach ice cream and peach jam, but had not really baked with peaches. Given my success with the blackberry rhubarb pie I decided to try a Peach Pie.
I found a wonderful recipe which to me feels like summer crossing over into fall. The perfect tribute to summer and a warm welcome to fall. A combo of two great flavors: peach and cinnamon. I never knew they worked so well together. But oh boy, do they work well together.
I'm really starting to get the hang of pies, so I can't wait to try out other flavors, but for now I'm just going to give you this recipe and hope you try it sometime, because it is well worth your time and energy.
Recipe
Brown Sugar - Cinnamon Peach Pie
Yield: 1 9-inch pie
Ingredients:
For the pie crust:
2 cups flour
1/4 teaspoon salt
1/2 cup, cold butter, cut into cubes
2 tablespoons sugar
4-6 tablespoons ice cold water
For the peach filling:
6-8 large fresh peaches
1/4 cup flour
1/2 cup brown sugar, firmly packed
1/3 cup + 1 1/2 tablespoons granulated sugar
1 teaspoon + 1/2 teaspoon ground cinnamon
Pinch of salt
2 tablespoons lemon juice
2 tablespoons butter, cut into little pieces
1 egg, lightly beaten
Instructions:
Start by making the pie crust.
Combine the flour, sugar and salt in a foodprocessor fitted with a metal blade.
Add the butter and mix until the mixture looks like coarse sand.
Add the water with 2 tablespoons a time, pulsing after each addition, until the dough holds together.
Divide the dough in two discs, making one larger than the other, and wrap them in plastic wrap.
Put the dough in the refrigerator for at least 1 hour.
Roll out the biggest disc of dough and put it into a greased 9-inch pie pan.
Preheat the oven to 220˚C (425˚F).
Make the filling when you are ready to use it. You can't let it stand to long because then the peaches will give off too much liquid.
Peel the peaches, cut in half and take out the pit. Cut the halves into 1/2-inch thick slices and cut those slices in half.
Whisk together the flour, sugars, cinnamon and salt in a large mixing bowl.
Add the peaches and the lemon juice and stir until everything is well coated.
Pour the filling into the pie pan.
Put the pieces of butter on top of the filling.
Roll out the remaining dough and cut it into long strips.
Place the strips of dough onto the filling and weave them together.
Press the ends of the strips together with the edge of the pie crust. Fold back the overhanging dough and crimp the edges.
Brush the top with the egg, then sprinkle with the leftover 1 1/2 tablespoon sugar and 1/2 teaspoon cinnamon.
Put the pie into the freezer for 15 minutes.
Bake the pie for 15 minutes on 220˚C (425˚F), then reduce the temperature to 190˚C (375˚F) and bake for another 40 minutes.
Transfer the pie pan to a cooling rack and let cool.
Serve with whipped cream or a scoop of vanilla ice cream.
Sources: pie crust adapted from Southern Pies, filling adapted from Pink Parsley
I found a wonderful recipe which to me feels like summer crossing over into fall. The perfect tribute to summer and a warm welcome to fall. A combo of two great flavors: peach and cinnamon. I never knew they worked so well together. But oh boy, do they work well together.
I'm really starting to get the hang of pies, so I can't wait to try out other flavors, but for now I'm just going to give you this recipe and hope you try it sometime, because it is well worth your time and energy.
Recipe
Brown Sugar - Cinnamon Peach Pie
Yield: 1 9-inch pie
Ingredients:
For the pie crust:
2 cups flour
1/4 teaspoon salt
1/2 cup, cold butter, cut into cubes
2 tablespoons sugar
4-6 tablespoons ice cold water
For the peach filling:
6-8 large fresh peaches
1/4 cup flour
1/2 cup brown sugar, firmly packed
1/3 cup + 1 1/2 tablespoons granulated sugar
1 teaspoon + 1/2 teaspoon ground cinnamon
Pinch of salt
2 tablespoons lemon juice
2 tablespoons butter, cut into little pieces
1 egg, lightly beaten
Instructions:
Start by making the pie crust.
Combine the flour, sugar and salt in a foodprocessor fitted with a metal blade.
Add the butter and mix until the mixture looks like coarse sand.
Add the water with 2 tablespoons a time, pulsing after each addition, until the dough holds together.
Divide the dough in two discs, making one larger than the other, and wrap them in plastic wrap.
Put the dough in the refrigerator for at least 1 hour.
Roll out the biggest disc of dough and put it into a greased 9-inch pie pan.
Preheat the oven to 220˚C (425˚F).
Make the filling when you are ready to use it. You can't let it stand to long because then the peaches will give off too much liquid.
Peel the peaches, cut in half and take out the pit. Cut the halves into 1/2-inch thick slices and cut those slices in half.
Whisk together the flour, sugars, cinnamon and salt in a large mixing bowl.
Add the peaches and the lemon juice and stir until everything is well coated.
Pour the filling into the pie pan.
Put the pieces of butter on top of the filling.
Roll out the remaining dough and cut it into long strips.
Place the strips of dough onto the filling and weave them together.
Press the ends of the strips together with the edge of the pie crust. Fold back the overhanging dough and crimp the edges.
Brush the top with the egg, then sprinkle with the leftover 1 1/2 tablespoon sugar and 1/2 teaspoon cinnamon.
Put the pie into the freezer for 15 minutes.
Bake the pie for 15 minutes on 220˚C (425˚F), then reduce the temperature to 190˚C (375˚F) and bake for another 40 minutes.
Transfer the pie pan to a cooling rack and let cool.
Serve with whipped cream or a scoop of vanilla ice cream.
Sources: pie crust adapted from Southern Pies, filling adapted from Pink Parsley
Labels:
Fruit,
Pies and Tarts and Cakes
Friday, August 26, 2011
Strawberry Cupcakes
The end of summer is drawing near and I find myself unwilling to let it go. These past few weeks the weather has already been rainy and to perk myself up I try to make the most of the summers produce. Knowing it is already a bit late for strawberries, I couldn't help myself and bought a bunch.
The next thing I did was look for a way to turn these strawberries into something yummy. And I found something alright. Strawberry Cupcakes! A lovely cake with the taste of strawberries topped with a strawberry swiss meringue buttercream. It is strawberry-bliss!
The cake is moist and fluffy and the buttercream tastes like strawberry ice cream. If I'm completely honest I think I'd ditch the cake altogether and just eat the frosting, it is so good!
Recipe
Strawberry Cupcakes
Yield: 1 dozen
Ingredients:
Cupcakes:
1 1/2 cup all-purpose flour, sifted
1 teaspoon baking powder
1/2 teaspoon baking soda
1/4 tsp kosher or coarse salt
1/2 cup butter, at room temperature
1 cup granulated sugar
1 large egg, at room temperature
2 large egg whites, at room temperature
1/4 cup whole milk, at room temperature
2/3 cup strawberries, rinsed, hulled and coarsely chopped
1 teaspoon vanilla extract
Frosting:
3/4 cup strawberries, rinsed, hulled and coarsely chopped
2 large egg whites
2/3 cup sugar
3/4 cup butter, at room temperature
Instructions:
Preheat the oven to 180˚C (350˚F). Fill a cupcake pan with cupcake liners.
In a medium bowl whisk together flour, baking powder, baking soda and salt. Set aside.
In a foodprocessor or blender and blend the strawberries to a puree until completely smooth.
In a small bowl mix together the vanilla, strawberry puree and milk and set aside.
In a stand mixer, cream together the butter and sugar on medium-high speed until light and fluffy.
Slowly add egg and egg whites and mix on medium speed until well blended.
Put the mixer on a low speed and add half the flour mixture until just blended.
Add the milk mixture and mix until just blended.
Add the remaining flour mixture and mix until just blended. Scrape down the bowl to make sure the entire mixture is smooth.
Divide the batter between the 12 cupcake cups and bake for 20-25 minutes or until tops are just dry to the touch.
Let the cupcakes cool completely before taking them out of the tin.
To make the frosting blend the strawberries in a food processor or blender until you have a completely smooth puree.
Put a heatproof bowl over a pan of simmering water and combine the egg whites and suger. Whisking frequently, heat the mixture until it reaches 71°C (160°F) and the sugar has dissolved.
Transfer the egg white mixture to the bowl of a stand mixer fitted with the whisk attachment. Beat the mixture until stiff peaks form and the mixture has cooled to room temperature, about 8 minutes.
Put the speed on medium and start adding the butter, about 2 tablespoons at a time. After each addition has been completely incorporated, add more.
It might take a while before the frosting looks good. If it looks soupy or curdled just continue to beat for about 3-5 minutes (or longer). It can be that the butter was to soft, so it sometimes helps to put the mixture briefly in the refrigerator.
Add the strawberry puree and blend until smooth, scraping the sides of the bowl as needed.
Fill a pastry bag fitted with a tip of your choice with the frosting and frost away!
Source: cupcakes slightly adapted from Sprinkles on Martha Stewart, frosting from Annies Eats
The next thing I did was look for a way to turn these strawberries into something yummy. And I found something alright. Strawberry Cupcakes! A lovely cake with the taste of strawberries topped with a strawberry swiss meringue buttercream. It is strawberry-bliss!
The cake is moist and fluffy and the buttercream tastes like strawberry ice cream. If I'm completely honest I think I'd ditch the cake altogether and just eat the frosting, it is so good!
Recipe
Strawberry Cupcakes
Yield: 1 dozen
Ingredients:
Cupcakes:
1 1/2 cup all-purpose flour, sifted
1 teaspoon baking powder
1/2 teaspoon baking soda
1/4 tsp kosher or coarse salt
1/2 cup butter, at room temperature
1 cup granulated sugar
1 large egg, at room temperature
2 large egg whites, at room temperature
1/4 cup whole milk, at room temperature
2/3 cup strawberries, rinsed, hulled and coarsely chopped
1 teaspoon vanilla extract
Frosting:
3/4 cup strawberries, rinsed, hulled and coarsely chopped
2 large egg whites
2/3 cup sugar
3/4 cup butter, at room temperature
Instructions:
Preheat the oven to 180˚C (350˚F). Fill a cupcake pan with cupcake liners.
In a medium bowl whisk together flour, baking powder, baking soda and salt. Set aside.
In a foodprocessor or blender and blend the strawberries to a puree until completely smooth.
In a small bowl mix together the vanilla, strawberry puree and milk and set aside.
In a stand mixer, cream together the butter and sugar on medium-high speed until light and fluffy.
Slowly add egg and egg whites and mix on medium speed until well blended.
Put the mixer on a low speed and add half the flour mixture until just blended.
Add the milk mixture and mix until just blended.
Add the remaining flour mixture and mix until just blended. Scrape down the bowl to make sure the entire mixture is smooth.
Divide the batter between the 12 cupcake cups and bake for 20-25 minutes or until tops are just dry to the touch.
Let the cupcakes cool completely before taking them out of the tin.
To make the frosting blend the strawberries in a food processor or blender until you have a completely smooth puree.
Put a heatproof bowl over a pan of simmering water and combine the egg whites and suger. Whisking frequently, heat the mixture until it reaches 71°C (160°F) and the sugar has dissolved.
Transfer the egg white mixture to the bowl of a stand mixer fitted with the whisk attachment. Beat the mixture until stiff peaks form and the mixture has cooled to room temperature, about 8 minutes.
Put the speed on medium and start adding the butter, about 2 tablespoons at a time. After each addition has been completely incorporated, add more.
It might take a while before the frosting looks good. If it looks soupy or curdled just continue to beat for about 3-5 minutes (or longer). It can be that the butter was to soft, so it sometimes helps to put the mixture briefly in the refrigerator.
Add the strawberry puree and blend until smooth, scraping the sides of the bowl as needed.
Fill a pastry bag fitted with a tip of your choice with the frosting and frost away!
Source: cupcakes slightly adapted from Sprinkles on Martha Stewart, frosting from Annies Eats
Labels:
Cupcakes and small cakes,
Fruit
Wednesday, August 17, 2011
Blackberry Rhubarb Pie
I know... it's a crappy picture. A crappy picture of a messy slice of pie. But that shouldn't matter when it comes to food. Because lets face it.... not everything you cook or bake turns out spectacular.... Most of the times it is the exact opposite. Well, at least in my case.
I've said it before and I will say it again, because I'm not ashamed of it (well, most of the time not...) I am not a great cook. I tend to rush things. Especially towards the end of a complicated recipe. Most of the time I don't even know what I'm doing and just try to wing it. Which brings me back to the messy slice of pie. I had never made a latice top for a pie before, so it turned out a bit.... how shall I put this delicately.... clumsily. But all that changed when I started eating that pie. All my dissatisfaction dissapeared, because let me tell you... that is one heck of a pie. It is one of the best fruit pies I ever had. Honestly! It was tart and sweet at the same time. The crust was sturdy enough to hold the filling, yet crumbly at the same time. We ate it slightly warm with whipped cream and it was like a little piece of heaven!
It was merely chance that had me make it in the first place. I bought some of the last rhubarb of the season at a farmers market and the next day we went picking blackberries again. So what do you do when you have to use them as soon as possible? Combine! And I am so glad I did. If you happen to stumble upon some rhubarb and blackberries....please make this pie. You will not regret it!
Recipe
Blackberry Rhubarb Pie
Yield: 1 9-inch pie
Ingredients:
For the pie crust:
2 cups flour
1/4 teaspoon salt
1/2 cup, cold butter, cut into cubes
2 tablespoons sugar
4-6 tablespoons ice cold water
For the filling:
350 gram blackberries
200 gram rhubarb
250 gram sugar
4 tablespoons flour
1 tablespoon butter
Instructions:
Start by making the pie dough.
Combine the flour, sugar and salt in a foodprocessor fitted with a metal blade.
Add the butter and mix until the mixture looks like coarse sand.
Add the water with 2 tablespoons a time, pulsing after each addition, until the dough holds together.
Divide the dough in two discs, making one larger than the other, and wrap them in plastic wrap.
Put the dough in the refrigerator for at least 1 hour.
Roll out the biggest disc of dough and put it into a greased 9-inch pie pan.
Preheat the oven to 200˚C (400˚F).
To prepare the filling cut the rhubarb in pieces.
In a big bowl gently mix together the blackberries, rhubarb, sugar and flour.
Pour the filling into the pie crust.
Cut the tablespoon of butter in small pieces and place these on top of the filling.
Roll out the remaining dough and cut it into long strips.
Place the strips of dough onto the filling and weave them together.
Press the ends of the strips together with the edge of the pie crust. Fold back the overhanging dough and crimp the edges.
Bake for the pie for 15 minutes on 200˚C (400˚F) then turn the temperature down to 180˚C (350˚F) and bake until the pie is done, about 30-35 minutes.
Let the pie cool to roomtemperature. Serve with whipped cream.
Sources: pie crust adapted from Southern Pies, filling adapted from Allrecipes.com
Labels:
Fruit,
Pies and Tarts and Cakes
Monday, August 15, 2011
Banana Cake with Chocolate Glaze
I recently discovered a new blog that I think I'm going to like very much! It is the blog of The Pastry Affair. So far I've tried only one recipe, but I think that is going to change very soon....
It all started out with a delicious looking Banana Cake with Chocolate Glaze. The great thing about this cake is that is looks fantastic because of the chocolate glaze, but is extremely easy to make. Now I know that the picture isn't great, but I really didn't stand a chance... I put the glaze on right after dinner because I had been to busy earlier and then when the cake was finished two girls demanded to eat it. RIGHT NOW!
Please don't let that put you off of this cake. It is moist, flavorful and the chocolate glaze makes it sinfully delicious! And because it is so easy to make, it makes for a great weekday dessert! It'll also work great if you want to impress someone...
Recipe
Banana Cake with Chocolate Glaze
Ingredients:
Banana Cake
2 1/2 cups flour
1 tablespoon baking powder
1 teaspoon cinnamon
1/2 teaspoon salt
1/2 cup butter, room temperature
1/2 cup granulated sugar
3/4 cup brown sugar
2 large eggs
3 overripe bananas, mashed
1 teaspoon vanilla extract
3/4 cup buttermilk
Chocolate Glaze
12 ounces semi-sweet chocolate
1/2 cup butter
Instructions:
Preheat the oven to 170˚C (325˚F).
Grease two 20 cm (8-inch) baking pans.
In a medium bowl stir together the flour, baking powder, cinnamon and salt.
In a different bowl, mix the butter and two sugars together until light and fluffly.
Add the eggs, one at a time, beating well after each addition.
Add the bananas and vanilla and mix together.
Beat in the flour and buttermilk in 5 additions, starting and ending with the flour.
Divide the batter evenly between the two baking pans.
Bake for 35-40 minutes, until golden and a toothpick inserted in the middle comes out clean.
Let the cakes cool for 10 minutes before removing them from the baking pans.
Let the cakes cool completely before frosting.
In a double boiler melt the chocolate and butter until smooth.
You might need to let it cool slightly until it is thick enough to spread. But don't let it cool too long or it will be difficult to spread.
Start with glazing the top of the bottom cake. Put the second cake on top of the first cake. Now glaze the rest of the cakes.
Enjoy!
Labels:
Chocolate,
Fruit,
Pies and Tarts and Cakes
Tuesday, July 26, 2011
Peach Ice Cream
We brought with us from France about a truckload of peaches, all of which had to be eaten in the course of three days. So what do you do when you've eaten all the peaches you can eat? That's right! You turn the peaches into something different. For instance.... Peach Ice Cream!
Now, I have to say that the weather here is terrible. It is almost like fall has come really, really early. But that doesn't stop me from making ice cream! I love ice cream all year round. I think it is one of the foods you can wake me up for at night.
I found the recipe in The Perfect Scoop (again). This book it starting to be really special to me... I'm definitely developing an intimate relation with it! I made one alteration: I reduced the amount of water to 1/4 cup, because I like my ice creams creamy. This worked out perfectly, because the peaches contain a lot of water also.
So without much further ado I give you: Peach Ice Cream.
Recipe
Peach Ice Cream
Yield: about 1 quart (or 1 liter)
Ingredients:
1 1/3 pounds (600 gram) ripe peaches (about 4 large peaches)
1/4 cup (60 ml) water (or 1/2 cup (125 ml))
3/4 cup (150 gram) sugar
1/2 cup (120 gram) sour cream
1 cup (250 ml) heavy cream
1/4 teaspoon vanilla extract
A few drops freshly squeezed lemon juice
Instructions:
Peel the peaches, remove the pits and slice them into chunks.
Put the peaches in a medium, nonreactive saucepan and cook them with the water over medium heat. Cover the pan, stir occasionally, until the peaches are soft and cooked through, about 10 minutes.
Remove the pan from the heat, stir in the sugar and let the mixture cool to room temperature.
Purée the mixture in a blender or foodprocessor with the rest of the ingredients until almost smooth but slightly chunky.
Chill the mixture thoroughly in the refrigerator.
Freeze the mixture in your ice cream maker according to the manufacturer's instructions.
Enjoy!
Source: slightly adapted from The Perfect Scoop, David Lebovitz
Sunday, July 17, 2011
Super Lemon Ice Cream
Due to unlucky circumstances my big baby girl had to spend an afternoon home without friends or baby sister. None of her friends were able to play and so she was faced with nothing to do. Off course there were plenty of things to do, but for some reason she was bored. And so I was faced with a dilemma. Do I let her be bored and grumpy? This would usually be my choice as I think it is also a bit of a learning experience for her... Or do I pick her up and do something fun with her?
I chose to do something with her, but under my conditions. I wanted her to help me cook something. Anything...didn't matter what. She could choose.
And she chose ice cream. But not just any ice cream. No, my baby girl has a thing for lemons, absolutely loves them! So when we found a recipe for Super Lemon Ice Cream, the choice was obvious.
Super Lemon Ice Cream it was to be. Again this is an easy recipe. No cooking involved (my favorite!), a nice fresh taste, but not too lemony so you won't be puckering up. No, it has a very full lemon flavour, but one you can easily handle. All-in-all a great recipe for those hot, sweltering days, when you really don't feel like doing anything!
Recipe
Super Lemon Ice Cream
Yield: about 1 quart
Ingredients:
Zest of 2 lemons
1/2 cup sugar
1/2 cup freshly squeezed lemon juice (from 2-3 lemons)
2 cups of half-and-half
Pinch of salt
Instructions:
Zest the lemons directly into a food processor or blender.
Add the sugar and blend until the lemon zest is very fine.
Add the lemon juice and blend until the sugar is completely dissolved.
Blend in the half-and-half until smooth.
Chill for 1 hour, then freeze the mixture in your ice cream machine according to the manufacturer's instructions.
Enjoy!
Source: The Perfect Scoop, David Lebovitz
I chose to do something with her, but under my conditions. I wanted her to help me cook something. Anything...didn't matter what. She could choose.
And she chose ice cream. But not just any ice cream. No, my baby girl has a thing for lemons, absolutely loves them! So when we found a recipe for Super Lemon Ice Cream, the choice was obvious.
Super Lemon Ice Cream it was to be. Again this is an easy recipe. No cooking involved (my favorite!), a nice fresh taste, but not too lemony so you won't be puckering up. No, it has a very full lemon flavour, but one you can easily handle. All-in-all a great recipe for those hot, sweltering days, when you really don't feel like doing anything!
Recipe
Super Lemon Ice Cream
Yield: about 1 quart
Ingredients:
Zest of 2 lemons
1/2 cup sugar
1/2 cup freshly squeezed lemon juice (from 2-3 lemons)
2 cups of half-and-half
Pinch of salt
Instructions:
Zest the lemons directly into a food processor or blender.
Add the sugar and blend until the lemon zest is very fine.
Add the lemon juice and blend until the sugar is completely dissolved.
Blend in the half-and-half until smooth.
Chill for 1 hour, then freeze the mixture in your ice cream machine according to the manufacturer's instructions.
Enjoy!
Source: The Perfect Scoop, David Lebovitz
Saturday, July 16, 2011
Berry Tartlets
Whenever we are in France we indulge ourselves in, well almost anything, from the beautiful scenery, to the fantastic weather, but mostly we indulge ourselves in the amazing food. One of the things that to me are mandatory are Fruit Tartlets. You can get these at any patisserie and, though there are off course differences, they are always good.
When I'm eating a fruit tartlet it instantly transports me back to warm lazy summer days in France.
This time of year there are a lot of different berries, so when my baby girl came home from school with a whole bunch of berries from the school garden I immediately wanted to make these typical french fruit tartlets. The beauty of these tartlets is that you can use any kind of fruit you like. I love them with raspberries, but other kind of berries are high on the list as well.
I love the combination of the sweetness of the pastry cream combined with the tanginess of the berries. It is a piece of summer on a plate.
Although you can make one big tart I love these in one-person tartlets. It also makes handling the tartlets easier, as the dough is very, very fragile. Which it is supposed to be, but making it into a large tart can be very tricky...
You can prepare everything ahead and assemble the tartlets the moment you need them. It only takes a couple of minutes to put everything together. So it makes these tartlets perfect for a dessert with a huge wow-factor!
Recipe
Berry Tartlets
Yield: 6 one-person tartlets
Ingredients:
For the tartlets:
1 1/2 cups flour
1/2 cup confectioners' sugar
1/4 teaspoon salt
9 tablespoons very cold butter, cut into small pieces
1 large egg yolk
For the pasty cream:
1 cup whole milk
3 large egg yolks
1/4 cup sugar
2 1/2 tablespoon cornstarch, sifted
1 teaspoon vanilla extract
2 tablespoons butter, cut in to bits, at room temperature
1 - 1 1/2 pints berries of your choice
1/4 cup red currant jelly mixed with 1 teaspoon water, for glazing (optional)
Instructions:
For the Tartlets:
Put the flour, confectioners' sugar and salt in a food processor and pulse a couple of times to combine. Scatter the pieces of butter over the dry ingredients and pulse until the butter is coarsely cut in.
Stir the egg yolk, to break it up, and add it little by little to the flour, pulsing after each addition. When the egg yolk is completely in, process in long pulses, about 10 seconds, until the dough forms clumps and curds. Just before you reach this stage the sound of the machine will change.
Turn the dough out onto a work surface and, very lightly and sparingly, knead the dough just to incorporate any dry ingredients that might have escaped mixing. But keep the kneading to a bare minimum.
Butter the tartlet pans (with a removable bottom). Press the dough evenly over the bottom and up the sides of the pan, using all but one little piece of dough, which you should save in the refrigerator to patch any cracks after the crust is baked.
Freeze the crust for at least 30 minutes, preferably longer, before baking. Center a rack in the oven and preheat the oven to 190˚C (375˚F).
Butter the shiny side of a piece of aluminum foil and fit the foil, buttered side down, tightly against the crust. Because you froze the crust, you can bake it without weights. Put the tartlet pans on a baking sheet and bake the crust for 25 minutes. Carefully remove the foil.
Bake the tartlets for another 5-8 minutes until firm and golden brown. Transfer the tartlets to a wire rack and let cool to room temperature before filling.
For the pastry cream:
Bring the milk to a boil in a small saucepan. In a medium heavy-bottomed saucepan, whisk the yolks together with the sugar and the cornstarch, until thick and well blended.
While whisking continually slowly drizzle in about 1/4 cup of the hot milk to temper the egg yolks. Slowly pour in the remaining milk, while still whisking. Put the pan over medium heat and, whisking vigorously, constantly and thoroughly, bring the mixture to a boil. Keep at a boil, still whisking, for 1 to 2 minutes, then remove the pan from the heat.
Whisk in the vanilla extract. Let sit for 5 minutes, then whisk in the bits of butter, stirring until they are fully incorporated and the pastry cream is smooth and silky.
Scrape the pastry cream into a bowl. Press a piece of plastic wrap against the surface and refrigerate until cold. Or put the bowl in ice cold water, stirring occasionally until thoroughly chilled, about 20 minutes.
Assembling the tartlets:
Smooth the pastry cream by giving it a couple of strong turns with a whisk. Spoon enough of the pastry cream into the crusts to come almost to the rim. Even the surface with a rubber spatula. Lay the berries on the cream, arranging them how you like.
For the glazing (optional):
Bring the jelly and the water to a boil. Working with a pastry brush, dab each berry with a spot of jelly, or glaze the entire surface of the tartlets. While I skipped this step it does keep the berries sticking together and to the tartlets, making them slightly easier to eat.
Source: Baking, from my home to yours, Dorie Greenspan
Labels:
Fruit,
Pies and Tarts and Cakes
Thursday, June 30, 2011
Peach Frozen yoghurt
Having both a new ice cream machine and a book filled with ice cream recipes should be total bliss! Too bad it's been raining almost non-stop these past few weeks...
But that hasn't stopped me completely from making ice cream. Every time the temperature rose slightly I ran to the store to get everything I needed to make some sort of ice cream. Any sort of ice cream... Doesn't matter what!
So when the temperature was going to rise again and I found good, ripe, flavourful peaches, it was meant to be...
Peach ice cream! I wanted a really fresh ice cream and found a recipe for Peach Frozen Yoghurt! Perfect!
The recipe is easy, but you still have to cook the peaches, so if at all possible....plan ahead, so you have enough time to let the mixture cool down. The recipe calls for 1/2 cup of water but I think you can minimize that further to 1/4 cup and up the yoghurt to 1 1/4 cup, that way it becomes a little creamier.
Recipe
Peach Frozen Yoghurt
Yield: about 3 cups
1 1/2 pound peaches (4-5 peaches)
1/4 - 1/2 cup water
3/4 cup sugar
1 - 1 1/4 cup plain whole-milk yoghurt
A few drops lemon juice
Instructions:
Peel the peaches, slice them in half and remove the pits.
Cut the peaches into chunks and cook them with the water in a medium, nonreactive, saucepan over medium heat, covered, stirring occasionally, until soft and cooked through, about 10 minutes.
Remove from the heat, stir in the sugar and chill in the refrigerator.
When the peaches are cool, purée them in a blender or food processor with the yoghurt until almost smooth, but slightly chunky.
Mix in a few drips of lemon juice.
Freeze the mixture in your ice cream machine according to the manufacturer's instructions.
Enjoy!
Source: The Perfect Scoop, David Lebovitz
But that hasn't stopped me completely from making ice cream. Every time the temperature rose slightly I ran to the store to get everything I needed to make some sort of ice cream. Any sort of ice cream... Doesn't matter what!
So when the temperature was going to rise again and I found good, ripe, flavourful peaches, it was meant to be...
Peach ice cream! I wanted a really fresh ice cream and found a recipe for Peach Frozen Yoghurt! Perfect!
The recipe is easy, but you still have to cook the peaches, so if at all possible....plan ahead, so you have enough time to let the mixture cool down. The recipe calls for 1/2 cup of water but I think you can minimize that further to 1/4 cup and up the yoghurt to 1 1/4 cup, that way it becomes a little creamier.
Recipe
Peach Frozen Yoghurt
Yield: about 3 cups
1 1/2 pound peaches (4-5 peaches)
1/4 - 1/2 cup water
3/4 cup sugar
1 - 1 1/4 cup plain whole-milk yoghurt
A few drops lemon juice
Instructions:
Peel the peaches, slice them in half and remove the pits.
Cut the peaches into chunks and cook them with the water in a medium, nonreactive, saucepan over medium heat, covered, stirring occasionally, until soft and cooked through, about 10 minutes.
Remove from the heat, stir in the sugar and chill in the refrigerator.
When the peaches are cool, purée them in a blender or food processor with the yoghurt until almost smooth, but slightly chunky.
Mix in a few drips of lemon juice.
Freeze the mixture in your ice cream machine according to the manufacturer's instructions.
Enjoy!
Source: The Perfect Scoop, David Lebovitz
Friday, June 17, 2011
White Chocolate and Raspberry Cupcakes
After my birthday party I found myself with a couple of left-over ingredients from the Chocolate Raspberry Cake and really wanted to use them. I concentrated on the fresh raspberries and the raspberry frosting and remembered a recipe by Ainsley Harriot. This particular recipe was about a muffin with white chocolate and raspberries, but as I am incapable of producing a normal muffin, I decided to adjust this idea into a cupcake.
And I have to say that I'm quite pleased with the end result. Big chunks of white chocolate and the juiciness of the raspberries make this a great cupcake, but the adding of the raspberry frosting elevates this into a great cupcake. Even my husband, who usually doesn't really like sweet and sugary cupcakes, loved this one!
Needless to say the cupcakes were gone all too soon....
Recipe
White Chocolate and Raspberry Cupcakes
Yield: 12
Ingredients:
Cupcakes:
125 gram (1 stick and 1 tablespoon) butter, room temperature
125 gram (2/3 cup) granulated sugar
2 large eggs
125 gram (1 cup and 2 tablespoons) self-raising flour
1/2 teaspoon vanilla-extract
2 tablespoons milk
125 gram (about 4 oz.) fresh raspberries
100 gram (3.5 oz.) chopped white chocolate, not too finely chopped
Raspberry frosting (this renders a lot of frosting, for a huge cake, so adjust to how much you need):
1 cup sugar
4 large egg whites
21 tablespoons butter, at room temperature
1/3 cup strained raspberry purée
1/2 teaspoon vanilla extract
Instructions:
Cupcakes:
Preheat the oven to 200˚C (400˚F).
Cream together the butter and sugar until light and fluffy.
Add the vanilla.
Add one egg at a time, followed by a tablespoon of flour, beating until the egg is completely incorporated before adding the next.
Stir in the rest of the flour.
When everything is mixed well, you can add the milk, as much as you think you need, I usually add 2 tablespoons, but you can use more or less.
Add the chocolate and the raspberries and very gently fold them into the batter.
Fill your muffin tray or just paper liners about 2/3 full and bake for 15-20 minutes, until a toothpick inserted comes out clean.
Let the cupcakes cool on a wire rack to cool completely before frosting with the raspberry frosting.
Raspberry frosting:
Combine the sugar and egg whites in a heatproof bowl set over a pot of simmering water.
Heat, whisking frequently, until the mixture reaches about 70°C (160°F) and the sugar has dissolved.
Transfer the mixture to the bowl of a stand mixer fitted with the whisk attachment.
Beat on medium-high speed until stiff peaks form and the mixture has cooled to room temperature, about 8 minutes (the bowl should be cool to the touch).
Reduce the speed to medium and add the butter, 2 tablespoons at a time, adding more once each addition has been incorporated and just keep going. If the frosting looks soupy or curdled, continue to beat on medium-high speed until thick and smooth again, about 3-5 minutes more (or longer).
Blend in the raspberry puree and vanilla until smooth and completely incorporated.
Labels:
Chocolate,
Cupcakes and small cakes,
Fruit
Wednesday, June 8, 2011
Chocolate Raspberry Cake
As I mentioned I fell in love with a Chocolate Raspberry Cake by Annie's Eats which I decided to make for my birthday. I had never actually made a real grown-up layer cake before, but decided to just go for it.
I started a week ahead with a trial bake for the chocolate cake which was in the recipe. Unfortunately it was a big disappointment. It was extremely heavy and much too moist for me. I wanted a nice fluffy and light chocolate cake. So I decided to make a sponge cake with some cocoa added for the chocolate flavour. And boy, was I glad I did! The frostings and fillings make this a quite heavy cake, but the light sponge cake makes it so much more balanced out! It is a great combination of textures and flavours.
This is not a cake you can just whip up. I planned an entire day for making this cake. This gave me plenty of time and kept the stress to a bare minimum. I had plenty of breaks so when the cake was finished I was not completely exhausted.
I wasn't sure about adding the chocolate glaze on top of the cake, but you should definitely add it. It completely transforms the cake. The recipe makes to much of the raspberry filling and the raspberry frosting, but you can easily use the left-overs for some wonderful other things. I also made a simple ganache for the top layer instead of chocolate glaze, but this was more because I didn't have any light corn syrup and that is something I can't easily come by.
Oh, one more thing... it was quite warm the day I made this, which made handling this cake quite tricky. I had to put the cake in the fridge a couple of times to make sure everything stayed were it was supposed to stay. And you should keep the cake in the fridge until serving time!
The end result is breathtaking. So if you have a special occasion coming up, make this cake! You won't regret it!
Recipe
Chocolate Raspberry Cake
Ingredients:
Chocolate cake:
1 7/8 cups flour
30 gram (1/4 cup) cocoa powder
9 eggs
1 1/8 cups caster sugar
90 gram (3 oz) butter, melted
Raspberry filling:
16 oz. frozen raspberries, thawed in a sieve over a bowl
1/3 cup sugar
3 tablespoons cornstarch
1 teaspoon lemon juice
Ganache filling:
8 oz. bittersweet chocolate, finely chopped
1 cup heavy cream
3 tablespoons butter, at room temperature
Raspberry frosting:
1 cup sugar
4 large egg whites
21 tablespoons butter, at room temperature
1/3 cup strained raspberry puree
1/2 teaspoon vanilla extract
For the chocolate glaze:
4 oz. bittersweet chocolate, finely chopped
1/2 cup heavy whipping cream
2 tablespoons butter, at room temperature
2 teaspoons vanilla extract
Instructions:
Start by making the cakes. Preheat the oven to 180˚C (350˚F).
Sift the flour and cocoa powder three times and set aside.
Place the eggs and sugar in a big bowl of an electric mixer and beat for 8-10 minutes, until thick, pale and tripled in volume.
Sift the flour and cocoa powder over the egg-mixture and gently fold through.
Fold through the melted butter.
Grease three 22 cm (9 inch) round cake tins and line the bases with parchment paper.
Divide the batter over the three cake tins and bake for 25 minutes until the cakes are springy to the touch and come away from the sides of the tin.
Let the cakes cool completely on wire racks.
For the raspberry filling, drain the thawed berries, reserving the juice in a liquid measuring cup.
Add water to the juice so that the total liquid equals 1 1/4 cups.
Add the liquid to a medium saucepan with the sugar and cornstarch.
Heat over medium-high heat, whisking occasionally, until the mixture begins to bubble and thicken. Keep whisking to make sure there will be no lumps.
Once thickened, remove from the heat and whisk in the lemon juice.
Fold in the drained berries with a spatula.
Cover and chill until ready to use (the filling will continue to thicken as it chills).
For the ganache filling, place the chopped chocolate in a heatproof bowl.
Heat the cream in a saucepan and bring to a simmer.
Immediately remove from the heat and pour the hot cream over the chopped chocolate.
Let stand 1-2 minutes, then whisk together until a smooth, thick ganache is formed.
Whisk in the butter 1 tablespoon at a time until completely incorporated.
Let the ganache sit to thicken a bit so that it is suitable for spreading and piping (this can take quite a while, to speed thickening, place the bowl in the fridge or freezer and whisk every 10 minutes to ensure even cooling until the desired consistency is reached).
Transfer about 1/2 cup of the thickened ganache to a pastry bag fitted with a plain round tip about 1/2-inch in diameter. Reserve another ½ cup of ganache in a small bowl or container (this can be used later for decorative detailing, if you want to).
Now it's time to start assembling the cake! Place one of the cooled cake layers on a cake board or serving platter.
Spread 1/2 cup of the ganache in an even layer over the cake. Using the reserved ganache in the pastry bag, pipe a border around the perimeter of the cake layer. This border will keep the raspberry filling in place, so make sure it is completely closed. If the ganache is a bit soft when you pipe it on the cake, put the cake with the ganache border in the fridge, so it becomes more solid.
Spoon some of the raspberry filling inside the ganache border in an even layer.
Top with another layer of cake and repeat this process, layering with another 1/2 cup of ganache and additional raspberry filling.
Top with the remaining cake layer.
The cake is really coming together now! The next step is the raspberry frosting. Combine the sugar and egg whites in a heatproof bowl set over a pot of simmering water.
Heat, whisking frequently, until the mixture reaches about 70°C (160°F) and the sugar has dissolved.
Transfer the mixture to the bowl of a stand mixer fitted with the whisk attachment.
Beat on medium-high speed until stiff peaks form and the mixture has cooled to room temperature, about 8 minutes (the bowl should be cool to the touch).
Reduce the speed to medium and add the butter, 2 tablespoons at a time, adding more once each addition has been incorporated and just keep going. If the frosting looks soupy or curdled, continue to beat on medium-high speed until thick and smooth again, about 3-5 minutes more (or longer).
Blend in the raspberry puree and vanilla until smooth and completely incorporated.
Frost the top and sides of the assembled cake with the raspberry frosting, smoothing the surface as much as possible.
Chill for at least 30 minutes!
To make the chocolate glaze, place the chocolate in a medium bowl.
Heat the cream in a small saucepan over medium heat until simmering.
Pour the hot cream over the chocolate and let sit 1-2 minutes.
Whisk until the mixture is smooth and homogenous.
Blend in the vanilla.
Pour the glaze into a pitcher or measuring cup and let cool for 10 minutes (do not let the glaze cool too long or too short or it may become difficult to pour over the cake).
Slowly pour the glaze over the cake, ensuring that the top is covered and the glaze slowly drips over the sides.
Let the glaze set about 5-10 minutes.
Transfer the reserved ganache to a pastry bag fitted with a decorative tip. Pipe swirls of ganache around the edge of the top of the cake and top each swirl with a fresh raspberry.
Chill the cake until ready to serve.
Labels:
Chocolate,
Fruit,
Pies and Tarts and Cakes
Friday, May 27, 2011
Strawberry Ice Cream
My ice cream machine broke down! It left me heartbroken and crying in the kitchen. But then I realised I had an excuse to buy a new one! I always love it when I have a valid reason to spend some money! So I started doing some research on ice cream machines. I would have loved to buy a self-freezing machine, but with prices starting at € 400,- I decided that was a bit too much. After a while I remembered that you can buy an ice cream maker attachment for a Kitchenaid standmixer. I was sold. It's perfect because you just put the bowl in the freezer and don't have to store an extra machine!
So I went out and bought it, put the bowl in the freezer and the next day I made this strawberry ice cream. It is another recipe from joy of baking. After the huge success of the chocolate ice cream I wanted to try out this recipe, to see if it would turn out just as great.
It was another custard-based ice cream, so it was indeed very creamy and smooth. But I did found it slightly lacking in the strawberry-department. I was looking for an ice cream which was bursting with strawberry-flavour. However, this is a very nice ice cream, but maybe more for a fancy dinner or a cold day.
Strawberry Ice Cream
Ingredients:
2 cups half-and-half
5 large egg yolks
2/3 cup granulated sugar
1/2 vanilla bean
2/3 cup strawberry puree (strawberries pureed with a little sugar and a squize of lemon juice)
Instructions:
In a saucepan bring the half-and-half and the vanilla bean to the scalding point where the milk begins to foam up.
Remove from heat and take out the vanilla bean. Split the vanilla bean lengthwise in half and scrape out the seeds with the back of a knife. Mix the seeds back into the half-and-half.
Beat the egg yolks and sugar in a stainless steel bowl until light and fluffy (about 2 minutes).
Very slowly pour the scalding half-and-half into the egg yolk mixture. Whisk constantly so the eggs don't curdle.
Place the stainless steel bowl over a pan with simmering water and cook until the custard thickens. It needs to coats the back of a wooden spoon (77˚C or 170˚F).
Remove the custard from the heat and stir for a couple of minutes, making sure the custard doesn't overcook.
Stir in the strawberry puree.
Cover and let cool to room temperature. Then refrigerate until the custard is completely cold.
Pour the custard into your ice cream machine and follow the manufacturer's instructions.
Enjoy!
Tuesday, May 3, 2011
Banana Bread
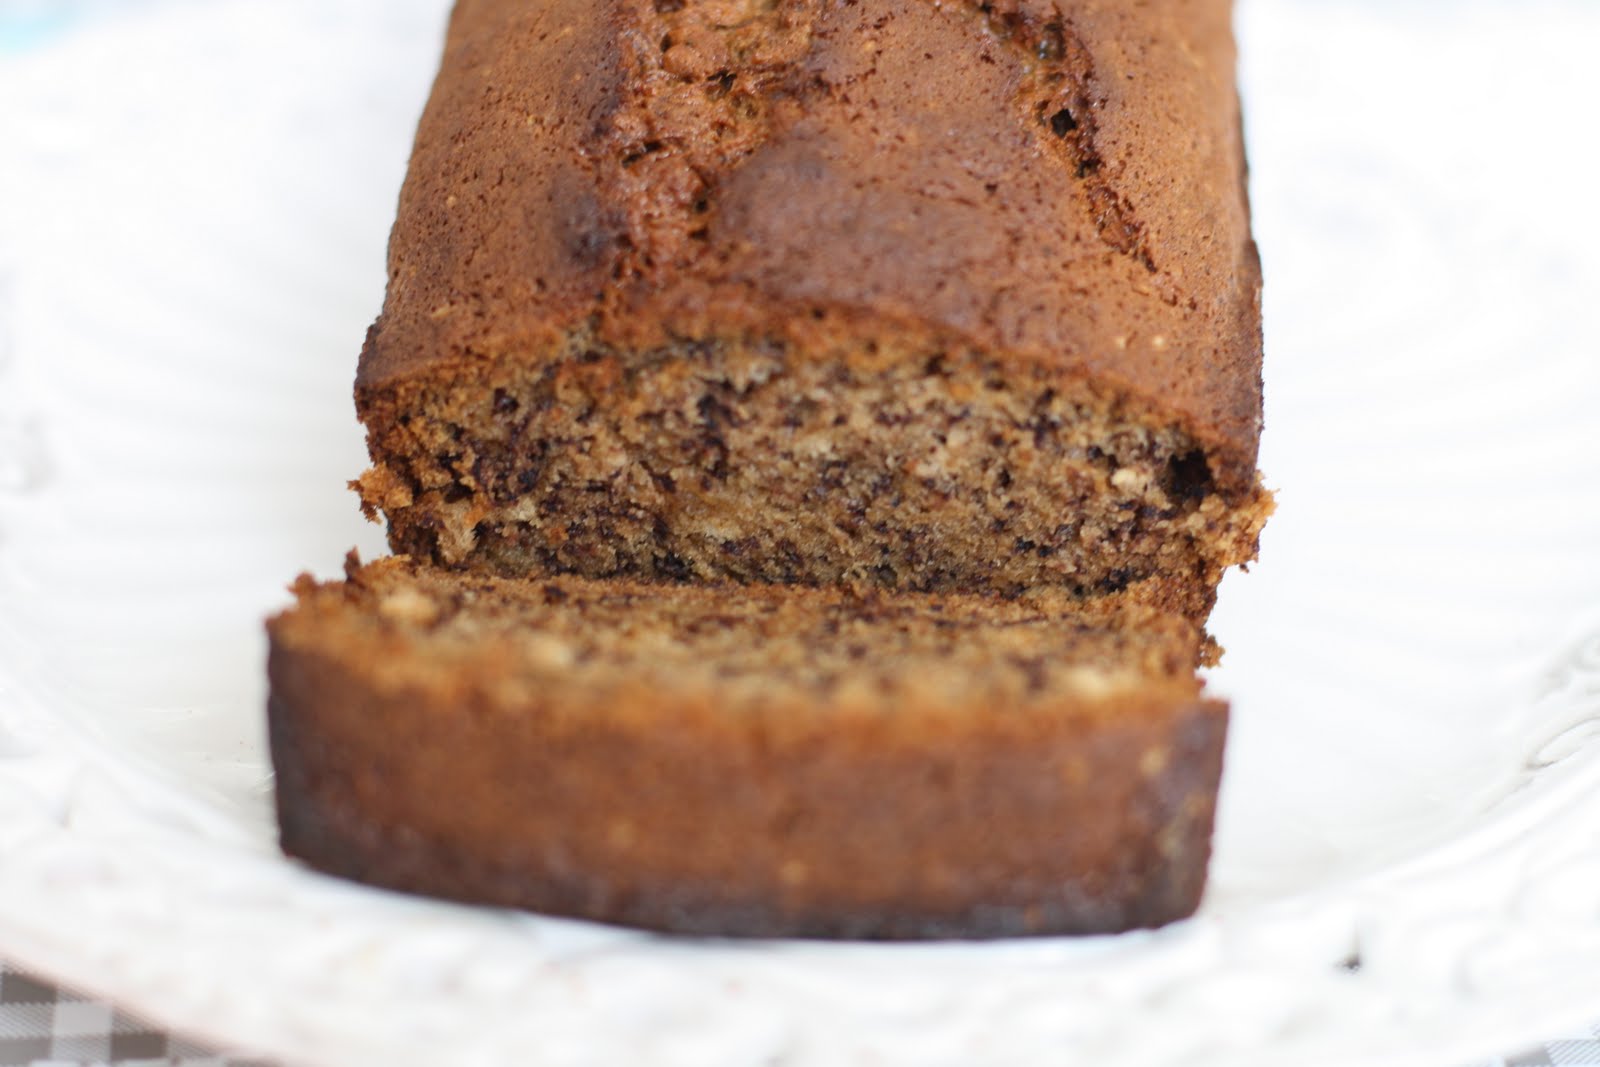
I've always had a fear for baking with bananas, but after making the Hummingbird Cupcakes, a while ago I actually fell in love with it. The only problem is having ripe bananas which I can use for baking. You see, my girls love bananas, it's impossible for them to see a banana and not eat it. Which makes sure that I never ever have any bananas left over, which have had enough time to become really ripe.
So, when I suddenly found myself with a whole bunch of very ripe bananas, I was shocked. And then I danced with joy! Now I could finally bake something with bananas again! I decided not to leave anything to fate and began a search for a nice banana recipe. For some time I've been thinking about a banana bread and so with a mission I searched through cookbooks and online.
After looking over several recipes, I found a winner: jacked-up banana bread by Smitten Kitchen. I've read some of her recipes before, but had never actually made one. So I was curious to see if the recipe would turn out okay. It did.
It was warm, moist, full of flavor, the top was slightly crunchy and it was gone all to soon.... I didn't add the bourbon, but that was mostly because I didn't have any. I think adding chopped walnuts would go great with this recipe, but unfortunately... I didn't have any. Maybe next time! Because I will definitely make this again. It was so easy. It doesn't require a mixer, you can just stir everything by hand... or you can be like me and let your baby girl do all the stirring. That's how easy it was!
I used hot air circulation on my oven which shortened the baking time by 10 minutes. I think it would go better with out the hot air circulation.
The top was slightly too dark. But all in all I was very pleased with the end result!
Recipe
Banana Bread
Ingredients:
3 to 4 ripe bananas, mashed
1/3 cup melted butter
3/4 to 1 cup light brown sugar (depending on the level of sweetness you prefer)
1 egg, beaten
1 teaspoon vanilla
1 tablespoon bourbon (optional)
1 teaspoon baking soda
1/2 teaspoon salt
1 teaspoon cinnamon
1/2 teaspoon nutmeg
Pinch of ground cloves
1 1/2 cup flour
Instructions:
Preheat the oven to 350°F.
With a wooden spoon, mix butter into the mashed bananas in a large mixing bowl.
Add the sugar, egg, vanilla and bourbon, mix, then add the spices and mix again.
Sprinkle the baking soda and salt over the mixture and mix in.
Add the flour, mix. Pour mixture into a buttered 4×8 inch loaf pan.
Bake for 50 minutes to one hour, or if you use hot air circulation 40 minutes, until a tester comes out clean. Cool on a rack. Remove from pan and slice to serve.
You can start eating when it's still warm but it also tastes great cold!
So, when I suddenly found myself with a whole bunch of very ripe bananas, I was shocked. And then I danced with joy! Now I could finally bake something with bananas again! I decided not to leave anything to fate and began a search for a nice banana recipe. For some time I've been thinking about a banana bread and so with a mission I searched through cookbooks and online.
After looking over several recipes, I found a winner: jacked-up banana bread by Smitten Kitchen. I've read some of her recipes before, but had never actually made one. So I was curious to see if the recipe would turn out okay. It did.
It was warm, moist, full of flavor, the top was slightly crunchy and it was gone all to soon.... I didn't add the bourbon, but that was mostly because I didn't have any. I think adding chopped walnuts would go great with this recipe, but unfortunately... I didn't have any. Maybe next time! Because I will definitely make this again. It was so easy. It doesn't require a mixer, you can just stir everything by hand... or you can be like me and let your baby girl do all the stirring. That's how easy it was!
I used hot air circulation on my oven which shortened the baking time by 10 minutes. I think it would go better with out the hot air circulation.
The top was slightly too dark. But all in all I was very pleased with the end result!
Recipe
Banana Bread
Ingredients:
3 to 4 ripe bananas, mashed
1/3 cup melted butter
3/4 to 1 cup light brown sugar (depending on the level of sweetness you prefer)
1 egg, beaten
1 teaspoon vanilla
1 tablespoon bourbon (optional)
1 teaspoon baking soda
1/2 teaspoon salt
1 teaspoon cinnamon
1/2 teaspoon nutmeg
Pinch of ground cloves
1 1/2 cup flour
Instructions:
Preheat the oven to 350°F.
With a wooden spoon, mix butter into the mashed bananas in a large mixing bowl.
Add the sugar, egg, vanilla and bourbon, mix, then add the spices and mix again.
Sprinkle the baking soda and salt over the mixture and mix in.
Add the flour, mix. Pour mixture into a buttered 4×8 inch loaf pan.
Bake for 50 minutes to one hour, or if you use hot air circulation 40 minutes, until a tester comes out clean. Cool on a rack. Remove from pan and slice to serve.
You can start eating when it's still warm but it also tastes great cold!
Labels:
Fruit,
Pies and Tarts and Cakes
Friday, April 15, 2011
Simple Lemon Cupcakes
I had a lemon left over and didn't really know what to do with it, so I started to google. I found a couple of recipes for different sort of lemon cupcakes and although the idea appealed to me...I was feeling a bit lazy and not in the mood to make a lemon curd or a difficult frosting. So in the end I decided I could just use my basic cupcake recipe and add some lemon. I did the same with the frosting. And I have to say... I liked the end result. The cupcakes had a very mild lemon flavor and the frosting was spectacular! Sweet and tang at the same time. I couldn't stop eating it. I made the frosting deliberately thin and pricked holes in the top of the cakes so the frosting could sink into the cupcakes.
Recipe
Lemon Cupcakes
Ingredients:
125 gram (1 stick and 1 tablespoon) soft butter
125 gram (2/3 cup) sugar
2 large eggs
125 gram (1 1/8 cup) self raising flour
Juice and zest of 1 lemon
Icing sugar
Instructions:
Preheat the oven to 200°C (400°F).
Mix the butter and the sugar until creamy and fluffy.
Add the lemon zest then add one egg and a spoonful of flour and mix thoroughly. Add the other egg with a spoonful of flour and mix again thoroughly.
Add the rest of the flour, mix well.
When everything is mixed well add in 1 tablespoon of the lemon juice.
Fill a muffin tray with cupcake papers. Fill each paper cup about 2/3 full. Bake for 15-20 minutes.
To prepare the frosting mix some icing sugar with the rest of the lemon juice. You can keep it quite thin.
When the cupcakes are done, transfer them to a cooling rack. With a satay stick prick holes in the top of the cupcakes. Drizzle the frosting over the warm cupcakes and let them cool.
Recipe
Lemon Cupcakes
Ingredients:
125 gram (1 stick and 1 tablespoon) soft butter
125 gram (2/3 cup) sugar
2 large eggs
125 gram (1 1/8 cup) self raising flour
Juice and zest of 1 lemon
Icing sugar
Instructions:
Preheat the oven to 200°C (400°F).
Mix the butter and the sugar until creamy and fluffy.
Add the lemon zest then add one egg and a spoonful of flour and mix thoroughly. Add the other egg with a spoonful of flour and mix again thoroughly.
Add the rest of the flour, mix well.
When everything is mixed well add in 1 tablespoon of the lemon juice.
Fill a muffin tray with cupcake papers. Fill each paper cup about 2/3 full. Bake for 15-20 minutes.
To prepare the frosting mix some icing sugar with the rest of the lemon juice. You can keep it quite thin.
When the cupcakes are done, transfer them to a cooling rack. With a satay stick prick holes in the top of the cupcakes. Drizzle the frosting over the warm cupcakes and let them cool.
Labels:
Cupcakes and small cakes,
Fruit
Thursday, March 31, 2011
Apricot bars
Tonight is the night! Tonight we leave for Bali!! 10 glorious days of sun, fun, beach, sea and God knows what more! I am so excited! Of course I'm also stressed out, because it means saying good bye to my girls... But I'm reeeeeally trying to focus on the fun part.
This is our first real holiday together since, oh approximately 8 years, when our first girl was born. Of course we go on minibreaks a couple of times a year, but the longest was 3 night and 4 days. Which I already found very hard... You know what's funny? Occasionally....sometimes......okay, okay...quite regularly...you wish you could put the kids in a big black hole... I mean, I love my kids but they can be really annoying. But the moment I have to leave them behind, even if it's just for one night...I miss them like crazy.
Okay, enough blabbering. Let's get to work! I found another great recipe by Pioneer Woman. I keep forgetting to take pictures, but you can find what it looks like over here.
She calls it Apricot bars, but I personally think it's too sweet to be a bar. I think it's more a mix between a crumble and a really big cookie. But names aside... it just tastes good! Needless to say they vanished from my kitchen real fast! And I can't blame everybody else....I think I ate most of it...It happens okay? I just couldn't resist it!
Oh, and the recipe calls for an 8 inch square pan, but I just used a brownie pan, which worked excellent. And you can replace the apricot with other flavors. I'm already contemplating what flavor to use next time!
Recipe
Apricot bars
Yield: 24
Ingredients:
1 1/2 cup flour
1 1/2 cup oats
1 cup packed brown sugar
1 teaspoon baking powder
1/2 teaspoon salt
1 3/4 stick butter, not too cold
10-12 ounce apricot preserve
Instructions:
Preheat the oven to 350°F.
Mix all the ingredients except the apricot reserve together. Press half the mixture in a buttered 8 inch square pan, or something similar.
Spread the apricot preserve on top of the mixture.
Put the second half of the mixture on top of the apricot preserve. Try to press or pat the top as much as you can, but not too hard because you don't want to squeeze out the preserve.
Bake for about 30-40 minutes until it's light brown.
Let cool completely before you cut it into pieces! And I really mean it, because as usual I had a problem with waiting until it was completely cool and when I started cutting, it fell apart! So, again, don't be like me!
Oh and since I plan on spending the next 10 days in total bliss, I won't be posting!
This is our first real holiday together since, oh approximately 8 years, when our first girl was born. Of course we go on minibreaks a couple of times a year, but the longest was 3 night and 4 days. Which I already found very hard... You know what's funny? Occasionally....sometimes......okay, okay...quite regularly...you wish you could put the kids in a big black hole... I mean, I love my kids but they can be really annoying. But the moment I have to leave them behind, even if it's just for one night...I miss them like crazy.
Okay, enough blabbering. Let's get to work! I found another great recipe by Pioneer Woman. I keep forgetting to take pictures, but you can find what it looks like over here.
She calls it Apricot bars, but I personally think it's too sweet to be a bar. I think it's more a mix between a crumble and a really big cookie. But names aside... it just tastes good! Needless to say they vanished from my kitchen real fast! And I can't blame everybody else....I think I ate most of it...It happens okay? I just couldn't resist it!
Oh, and the recipe calls for an 8 inch square pan, but I just used a brownie pan, which worked excellent. And you can replace the apricot with other flavors. I'm already contemplating what flavor to use next time!
Recipe
Apricot bars
Yield: 24
Ingredients:
1 1/2 cup flour
1 1/2 cup oats
1 cup packed brown sugar
1 teaspoon baking powder
1/2 teaspoon salt
1 3/4 stick butter, not too cold
10-12 ounce apricot preserve
Instructions:
Preheat the oven to 350°F.
Mix all the ingredients except the apricot reserve together. Press half the mixture in a buttered 8 inch square pan, or something similar.
Spread the apricot preserve on top of the mixture.
Put the second half of the mixture on top of the apricot preserve. Try to press or pat the top as much as you can, but not too hard because you don't want to squeeze out the preserve.
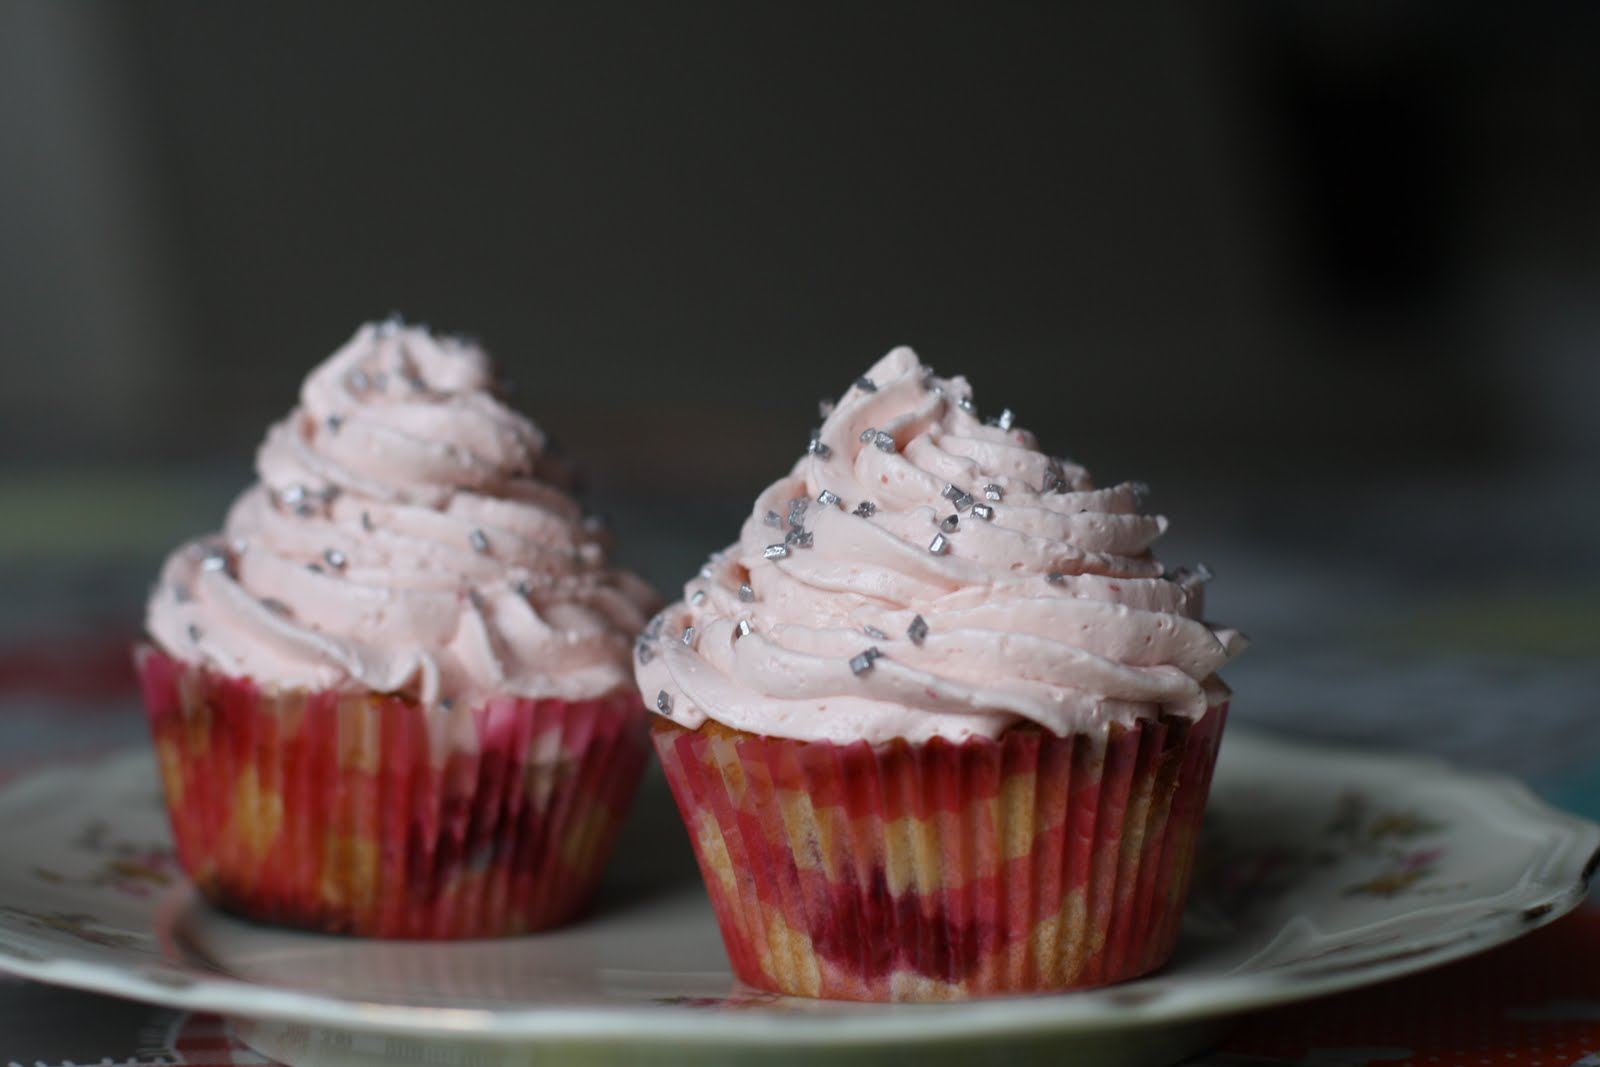
Bake for about 30-40 minutes until it's light brown.
Let cool completely before you cut it into pieces! And I really mean it, because as usual I had a problem with waiting until it was completely cool and when I started cutting, it fell apart! So, again, don't be like me!
Oh and since I plan on spending the next 10 days in total bliss, I won't be posting!
Labels:
Cupcakes and small cakes,
Fruit
Subscribe to:
Posts (Atom)